Wednesday, January 29, 2014

Vegetable & Mashed Potato Au Gratin

Gratin is a cooking technique, where the top - a mix of bread crumbs, cheese and oil / butter is browned in the oven to form a nice golden brown crust. The main ingredient is usually a vegetable or root or potato mixed with béchamel sauce baked till just cooked. The gratin I like to make is one with vegetable and mashed potato layers and baked with a golden crust topping.
Ingredients (serves 2 generous portions)
Potato - 3, large
Onion - 2, medium
Broccoli - 1/3 cup
Mushroom - 1/3 cup
Carrot - 1/3 cup
Baby Corn - 1/3 cup
Bread crumbs - 1/2 cup
Butter / Oil - 3 tbsp
Black Pepper pwd
Oregano – couple of pinches
Parmesan Cheese, grated - 1/4 cup
Whole Milk – 4 to 5 tbsp
for béchamel sauce
Flour - 2 tsp
Butter - 1 tbsp
Milk - 1 cup
Boil potatoes till soft. All vegetable measures are after cleaning and cutting into pieces. Slice onion and mushroom into thick slices. Cut the broccoli into florets, carrot into sticks and slit baby corn lengthwise and then halve it.
Heat 1 tbsp butter and sauté 3/4th of onion slices till just translucent and keep aside. Add 1 tbsp butter into the same pan and sauté the vegetables lightly without letting it cook. Mix the onion and vegetables and add a little salt and black pepper and keep aside.
Take the boiled potatoes and mash completely. Add a little salt and the 2 tbsp milk and 1 tbsp butter and mash together. Chop the remaining onion finely and add to the mashed potato, this is optional. I like to add it for the extra crunch.
Mix the bread crumbs, oregano and a pinch of salt and keep aside.
Prepare the sauce: Heat a pan and add the butter and let it melt and when hot add the flour in and mix well and sauté for a couple of minutes. When the flour is cooked completely add the milk in a steady stream, stirring all the while. Keep stirring till it thickens then take it off the heat and add the sautéed onion and vegetables and keep aside.
Preheat the oven to 200 degree C. Grease a baking dish with butter and keep aside.
In the baking dish, first evenly spread all of the mashed potato in the bottom of the dish. Then add the sautéed vegetables mixed in sauce on top of the mashed potato and spread evenly. Add the cheese on top and then top with the seasoned bread crumbs. Pop it into the oven and bake till the cheese melts and the top browns.
Serve the Vegetables and Mashed Potato Au Gratin hot with garlic bread or as is.  


My Vegetable & Mashed Potato Au Gratin goes to
- Flavours of the World - Grand Finale hosted by Nayna & "Light Dinners" guest hosted by abowlofcurry, originally by Vardhini of cooksjoy.


Saturday, January 25, 2014

Onion, Carrot & Radish Salad / Koshimbir

Koshimbir is salad in Marathi, and is generally made with a variety of vegetables in Maharashtra. I am in love with the koshimbirs of Maharashtra; it manages to capture a medley of tastes in each bite and is a mix of salt, sweet, pungency and sour. It often includes crushed peanuts and tempering. With fresh vegetables in season right now, making salads are a pleasure. So today's salad includes radish / mooli that is usually sweet at this time of the year. Here goes my onion, carrot and radish koshimbir / salad.
Ingredients
Radish / Mooli - 2
Carrot / Gajar - 3
Onion / Pyaaz - 1
Peanuts - 1/4 cup
Lime jce - a dash
Mustard seeds - 1/2 tsp
Turmeric pwd - 1/2 tsp
Ghee / Oil - 1 tsp
Sugar - 1 tsp
Salt as per taste
Wash the radish and carrots and peel off the skin. For a change, instead of grating or chopping, I used the peeler and continued peeling the radish and carrot to get different sized and textured pieces. Thinly slice the onion.
 
Lightly roast the peanuts and rub the skin off and crush it roughly. In a bowl, mix the sugar, salt and lime juice together. Add to it the carrot, mooli and onion and the peanuts and mix.
 
Heat a pan and add the ghee / oil and when hot add the mustard seeds. Once the mustard seeds splutter take it off the heat and add the turmeric powder and immediately pour it on the salad. Mix well and serve. 

My Onion, Carrot & Radish Salad / Koshimbir goes to New "U" hosted by Vardhini, Flavours of the World - Grand Finale hosted by Nayna, "Light Dinners" guest hosted by abowlofcurry, originally by Vardhini of cooksjoy & North East West Indian Cooking hosted by Anu


Upside Down Peach Cake


For some time now, I wanted to make a cake incorporating fruits. Initially, it was the veritable treasure of fruits I saw in the market that got me thinking on these lines. A search on the internet gave cake recipes with apples, pineapples, apricots, peaches and pears. So when I saw tinned peaches in a factory outlet in Kasauli, I quickly bought one expecting to make some lovely desserts.

Ingredients
for caramelization
Butter - 1/4 cup
Brown sugar - 1/2 cup
for cake
Peaches, cut into slices - 2 large or 3 medium sized
Butter, softened - 1/2 cup
Sugar - 2/3 cup
Egg - 1
Flour – 1.5 cups
Baking powder - 2 tsp
Salt - 1/4 tsp
Milk - 2/3 cup
Vanilla essence - 1 tsp

Melt the 1/4 cup butter in 8 or 9" cake round (here I used a 7" x 11" baking dish and it worked just fine). Mix in 1/2 cup brown sugar and make sure entire bottom is coated with this mixture. Gently lay peaches in butter/brown sugar. I used tinned peaches, about 3 halves, both to line the bottom of the cake pan and chopped some to add to the batter.

Cream 1/2 cup butter and 2/3 cup white sugar until light and fluffy. Beat the egg in. In a separate bowl stir together flour, baking powder and salt. To the creamed mix, add the flour mix alternately with milk and continue beating. Finally, add the vanilla essence. If you have any left-over peach slices that didn't fit in the bottom of the pan, chop them up and add them to the batter. Gently spread the batter over peach slices, there will be just enough batter to cover the slices.

Bake at 175 degrees C for 30 to 40 minutes or until you have a lightly browned top. Check if the cake is done after 30 minutes and if not done bake for some more time. Once done, allow to sit for 5 minutes. Loosen cake edge with knife and invert onto serving plate. If you wait too long, it will stick to the pan. Or use a springform cake pan like I did and only the bottom needs to be loosened.


Friday, January 24, 2014

Carrot Fenugreek / Gajar Methi Sabzi

We had this, Gajar Methi sabzi / Carrot Fenugreek vegetable for the first time at a restaurant in Jodhpur. This sabzi / vegetable was one of the dishes served in the thali at Gypsy restaurant. The red juicy carrot / gajar works best in this dish; the combination of slightly bitter methi with the sweetness of the carrot and the slight pungency from the chillies makes for a great dish. This sabzi is healthy with the goodness of the carrots and methi cooked in very little oil and spices.
 
Ingredients
Carrots / Gajar - 1 cup
Dry fenugreek / methi leaves - 1/4 cup
Green chillies - 2
Asafoetida / Hing pwd - a couple of pinches
Red chilli pwd - 1/2 tsp
Turmeric pwd - 1/2 tsp
Fenugreek / Methi seeds - 8 to 10 (optional)
Oil - 1tsp
Salt as per taste
Dice carrots into medium sized pieces and slit green chillies and keep aside. Add a little water and soak the dry fenugreek / methi leaves.
 
Heat a pan and add the oil. Once the oil is hot, add the fenugreek seeds and stir after about 30 seconds add asafoetida powder and stir a couple of times. Then add the turmeric powder and green chillies and stir and put in the carrot pieces and red chilli powder. Stir and add salt and cover to cooksprinkle about 1/8th cup of water little by little to help the carrot to cook. When the carrot is half cooked add the soaked fenugreek or methi. Cover and cook for a few more minutes till the methi softens and all tastes mix together. Check for salt and adjust if necessary. Take off the heat and keep covered till ready to serve.
Serve this Carrot Fenugreek / Gajar Methi Sabzi with rotis.


My Carrot Fenugreek goes to
- Flavours of the World - Grand Finale hosted by Nayna, North East West Indian Cooking hosted by Anu & New "U" hosted by Vardhini.


Wednesday, January 22, 2014

Surmai / Neimeen / Kingfish Tawa Fry

We went to the fish market in INA last weekend and bought kingfish / surmai and mackerel / bangda. This time we got a whole kingfish / surmai that was not too big, it was then cleaned and cut as per our choice. The fish vendor also had some really big surmai that would be filleted according to the customers' choice. At home, the only way to cook kingfish / surmai is to fry it. We like to tawa fry the fish after marinating it for some time in the masalas. 

Tawa fish fry is where the fish slice is fried in a tawa or a very shallow pan with enough oil to cover the underside of the slice of fish. If necessary oil can be added little by little as more batches are fried. Also another feature is that this fish is not batter coated but is fried with only the marinade on.
Ingredients
Surmai - 500 gms
Onion - 1/2
Garlic - 7 to 8 cloves
Red chilli pwd - 1 tsp
Black pepper pwd - 1tsp
Turmeric pwd - 1 tsp
Salt as per taste
Oil - 4 to 5 tbsp
Clean and slice the fish and keep aside.
Grind the onion and garlic with no water or as less water as possible. Take this mix into a bowl and add the red chilli, pepper and turmeric powders and the salt and mix together with a spoon. When mixed well, apply to each slice of fish and let it marinate in the refrigerator for at least 1 hour.
 
Heat a tawa or if you do not have one, use a shallow pan and add the oil into it. This is not a deep fried fish, it is done with enough oil to coat the bottom of the fish completely without submerging the slice. When the oil is hot, lower the heat on low to medium and place the fish slices in, leaving space between slices. After about 5 to 8 minutes, turn the slice over and cook. Fry both sides till the slices are cooked, till firm. If you do not want your fish crisp, take it out once the fish is firm and golden on both sides. At home, we like our fish to be fried firm and crisp on the outside and is mostly done till browned. Enjoy this fried fish with rice and dad or sambhar.


Monday, January 20, 2014

Baba Ganoush - eggplant dip

Baba ganoush, or Baba ganouj as it is also known as, is a Lebanese dip made from roasted eggplant and a few other ingredients. It is paired with chips, pita, tortilla chips, etc., and can be served as one of the starters when you have a group of friends over.
Ingredients
Eggplant / Brinjal - 1
Tahini - 4 tsp
Garlic - 5 cloves
Sesame seeds - 1 tsp
Lemon jce - 2 tsp
Olive oil - 1 tbsp
Salt as per taste
to serve
Red chilli flakes - 1 tsp
Raw onion, chopped - 2 tbsp (optional)
Pita chips - bowl
Prick the eggplant all over and then roast the eggplant in an oven at 200 degrees C. The eggplant can also be roasted on the stove top, to do this - rub oil all over the eggplant and hold over the fire. Use a pair of tongs to do this. Once the skin of the eggplant is charredm take it off the heat and let it cool. Then with the blunt side of a knife, brush off the charred skin from the eggplant.

Roughly mash the insides of the eggplant with the back of the fork. Add the eggplant, tahini, garlic, sesame seeds and lemon juice to a blending jar and blend till it is a smooth paste. Spoon this into a bowl and add the olive oil and red chilli flakes and mix. Serve with the chopped raw onions along with a bowl of pita chips.


My Baba Ganoush goes to
 - "Flavors of the World - Grand Finale" hosted by simplysensationalfood


Saturday, January 18, 2014

Pita Bread Chips

Pita is a leavened bread that is widely consumed in the Mediterranean and Middle Eastern cuisine and is now widely consumed across the world. Pita is used to make wraps, pocket sandwiches and chips. Today, I bring you Pita bread chips that can be served with various dips like hummus and / or babaganouj. It is very easy to make Pita at home, especially for Indians who make various breads like chapatis, theplas, naans and bhaturas - a mix of leavened and unleavened breads. So, let's go on to making Pita and then pita chips which is just a baby step from there. I referred to the recipe by Floyd Mann given here.
Ingredients (makes 8 Pitas)
for Pita Bread
All Purpose Flour - 3 cups (I used half wheat and half flour)
Salt - 1.5 tsp
Sugar - 1 tbsp
Yeast - 2 tsp (dry yeast)
Olive Oil - 2 tbsp
Warm the water and keep aside. In a bowl mix together the flour, salt, sugar then add the oil and water little by little to make a dough. You can mix with a fork or spatula or in a food processor and then once it comes together take it out. Then knead till the dough comes together and becomes springy it will take about 10 minutes. When done, oil the insides of a bowl and put the ball of dough in it and roll the dough around in the bowl so that the ball of dough is lightly coated with the oil. Cover the bowl with a damp towel and keep it in a warm place for the dough to rise. Keep for approximately 1.5 to 2 hours or till the ball rises to double its size. If you have time overnight keep it overnight. Once the dough has doubled, gently punch it down to release the air and divide the dough into 8 to 10 balls. Again, cover with a damp towel and keep in a warm place to rise for about 20 minutes. At this time, switch on the oven to 400 degrees Fahrenheit, if using an oven. It can also be cooked on an iron griddle on stove top.
 
After 20 minutes, take out one ball of dough at a time and roll each one with a roller pin. Use a little dry flour to help roll each ball into circles of 1/8th inch thickness. Again, keep this for about 5 to 10 minutes for the dough to relax. Insert a cookie tray (or baking stone, if you have one) into the oven and place as many pitas as possible with a little space in between each one. In about 3 to 5 minutes the pitas should puff up into balloons. If it does not puff up the dough may not have had enough time to relax, in that case let the balance pitas rest for about 10 minutes before baking.
 
If baking on a stove top, heat an iron griddle on medium to high heat and place one pita on it. The pita will rise in small bubbles, at this time flip it over and then it should rise completely. If it does not rise let it cook and take it off the heat. Do not let it burn. These pitas are good to eat as a wrap or crisp it and then have it plain, sprinkled with salt.
A tip to get the pitas to puff is to - Spritz very little water on each rolled out pita and let them rest for a couple of minutes and bake after that. If using an oven, Spray a little water on the cookie tray and close the oven for a few minutes and after that add the pitas in.
 
Ingredients for seasoned pita chips
Pita bread
Salt as per taste
Seasoning like - Oregano or Cayenne pepper or garlic powder or onion powder or dry mint pwd
Olive oil
Since I wanted to make chips, it did not matter if the Pitas puffed or not. Now, to make pita chips - preheat the oven to 200 degrees C. Mix the seasoning of choice, salt and olive oil, then rub or brush this on each pita. Cut each pita into 8 triangles and spread them on a cookie sheet and slide the tray into the oven. Bake for about 5 minutes or till crisp. It will bown lightly but do not let it burn.
 
Serve the Pita chips in a bowl with a dip of choice.


Thursday, January 16, 2014

Dal Dhokli

Dal Dhokli is a one meal dish from the Indian state of Gujarat, that combines dal / lentils and wheat dhokli / pasta. This one dish combines the goodness of both proteins and carbs. Although traditionally, vegetables are not included in this dish, it's addition would truly make it a complete meal. The recipe I referred to and have reproduced here, is by late Tarla Dalal, and this Dal Dhokli is good.
Like I mentioned above, though the original recipe does not include vegetables, I did add some and thought it blended well and enjoyed it. My suggestion would be to add the vegetables once the tadka is done and let it cook a few minutes before adding the dal. And yes, the dal does thicken quickly once the dhoklis are added so make it a thin dal to start with and enjoy it like a wholesome soup with a squeeze of lemon.

Ingredients
for the Dhoklis
Wheat flour - 1 cup

Bengal gram flour - 1 tbsp 
Turmeric pwd - 1/2 tsp

Red chilli pwd - 1/2 tsp

Asafoetida - 1/4 tsp

Oil - 1 tbsp

Carom seeds - 1/4 tsp
Salt as per taste
for the Dal
Tuwar Dal - 1 cup
Peanuts - 15 to 20
Vegetables - 3/4 cup (optional - I used diced carrots and radish and cabbage chunks)
Ghee - 2 tbsp

Oil - 1 tbsp

Mustard Seeds - 1/4 tsp

Cumin Seeds - 1/4 tsp

Fenugreek seeds - 1/4 tsp
Curry leaves - 5 to 6 
Cloves - 2

Cinnamon - 2 mm (1") piece

Bayleaf - 2

Whole dry red chilli

Asafoetida - 1/4 tsp 

Kokum - 5 

Jaggery - 5 tbsp

Turmeric pwd - 1/2 tsp 

Lemon jce - 1/2 tbsp

Green Chillies - 2

Red chilli pwd - 1/2 tsp 

Ginger - 1 tsp 
Salt as per taste
for the Garnish
Coriander leaves - 4 to 5 sprigs

Lemon wedges - a few
Method
for the dhoklis - Mix all the ingredients in a bowl and knead into a dough by adding water little by little. The dough should be firm and keep it covered till ready to roll. Divide these into big balls are roll out like into a circle. Heat a tawa and roast it like a chapati. Once all the dough is made into chapatis, cut them into small squares or diamonds and keep aside till ready to add to the dal.


for the dal - Wash the dal and peanuts and put them in two separate cooker containers. Add water and cook in a pressure cooker for 3 whistles. Once the pressure is completely released, take the dal out and mash it after saving the water in another container. Keep both the dal and peanuts aside.
 
Heat a saucepan and combine the oil and ghee and once hot add the mustard seeds. Let it splutter then add the cumin seeds, fenugreek seeds, curry leaves, cloves, cinnamon, bay leaf, whole dried red chillies and asafoetida. Sauté for a minute and then add the water from the cooked dal and peanuts and the vegetables (if including it in your dish). Add the turmeric powder, red chilli powder, green chillies, ginger, jaggery and soaked kokum. If using vegetables cook it for about five minutes if not add the mashed dal and peanuts and add water enough to get a thin consistency. Let this come to a boil stirring it a few times in between. Make sure the consistency is thin and add the coriander leaves and then take it off the heat.
 
When ready to serve, heat the dal and add water if necessary and get it to a boil. Add the dhokli pieces little by little stirring the dal gently all the while. Let the dal simmer for a couple of minutes and then take it off the heat. The dhoklis absorb the dal and swell a little. Serve it out in bowls with a wedge of lemon.
My dal was already thickening by the time I served myself

My Dal Dhokli from Gujarat goes to
 - "Flavors of the World - Grand Finale" hosted by simplysensationalfood
 - "Light Dinners" guest hosted by abowlofcurry, originally by Vardhini of cooksjoy


Tuesday, January 14, 2014

Mutton Biryani Nagercoil style

My love or should I say my craze for biryani has fitted me with a feeler antenna that keeps buzzing in search for new recipes. The Lucknowi and the Hyderabadi biryani is known to almost every Indian but a land as spread out as India has many more versions of this delectable dish. Variations in ingredients and process make a significant enough difference for the biryani to be named differently. 
And this is one such biryani, called the Nagercoil Mutton Biryani. Now  about the name? It is a recipe from Hotel Prabhu, which is a famous restaurant in Nagercoil, a town in Tamil Nadu. This restaurant is famous for its Mutton Biryani and has a small fan following of its own. This restaurant was covered in a regional channel TV in a program called Flavors of India which featured locally known restaurants. The chef of the restaurant shares one of the recipes and demonstrates cooking it.

Here, I have tried to recreate the Mutton Biryani in Nagercoil Hotel Prabhu style. What makes it different? Definitely the spices that go into it, it includes mace, nutmeg and star anise in sizable amounts. Parts of the recipe were a little unclear with the hostess’s contant talk so I had to estimate some of the ingredients a little but the result was awesome.
Ingredients
for the mutton
Mutton - 1/2 kg
Onion - 3, medium
Tomato - 2, medium
Yogurt - 1/4 cup
Ginger - 2 inch piece
Garlic - 10 to 12
Green Chilli – 3 to 4
Turmeric pwd - 1 tsp
Red chilli pwd - 1 tsp
Bay leaf - 3
Star anise - 3
Green Cardamom - 5
Black Cardamom - 1
Cloves - 8 to 10
Cinnamon stick - 2, 2 inch pieces
Mace - 4
Nutmeg – ½, crushed
Fennel pwd - 3/4th tsp
Coriander pwd - 1 tsp
Coriander leaves – 1/2 cup
Mint leaves - 1/4 cup
Oil - 3 tbsp
Butter - 3 tbsp
Salt as per taste
for the Rice
Rice - 2 cups
Cloves - 6
Cinnamon stick - 1, 2 inch piece
Green Cardamom - 3
Black Cardamom - 1
Bay leaf - 2
Salt as per taste
Butter – 1 tbsp
for assembling
Coriander leaves – 1/2 cup
Butter – 2 tbsp, melted
Clean and wash the mutton. Put it in a bowl and add a little salt and the turmeric and red chilli powders. Mix well and keep aside.
Slice the onion and chop the tomato, ginger, garlic and coriander leaves. Wash the rice and keep it soaked till ready to cook.

Heat a pressure cooker and add the oil and 3 tbsp butter. When hot add the bay leaf, cloves, cinnamon stick and the sliced onion and sauté. Add the star anise, green and black cardamoms, mace and nutmeg and continue sautéing. When the onion is light golden add the ginger and garlic and sauté. When the onion starts browning add the fennel and coriander powders and sauté. Add the marinated mutton and stir. Once mixed, add the chopped tomato and green chilies and sauté till the tomato softens. Add the mint and coriander leaves and cover and let the mutton cook. If you want it to be done quickly, cook it under pressure for a couple of whistles. Once the mutton is done, take off the heat.

Heat about 4 cups of water and let it come to a boil and lower the heat. Add some salt and the bay leaves, cardamoms, cinnamon and cloves. Add the rice after draining the soaked water out. Stir gently so that the rice doesn’t stick to the bottom and then cover with a lid and let it cook. Check the rice after about 5 to 8 minutes, add some salt if required and again cover. Check again after about 3 to 5 minutes if the rice is done. The rice should be 3/4th done and take it off the heat. Use a colander to drain the water out from the rice. Add a tablespoon of butter to the rice and mix.

To assemble, take half the mutton out of the cooker and layer the rice to cover the mutton completely. Sprinkle half the coriander leaves on the rice and then top it with mutton and spread it evenly over the rice. Layer the rest of the rice over the mutton and spread around evenly. Sprinkle the rest of the coriander leaves. Melt the balance butter and sprinkle it over the rice and down the sides of the cooker. The original recipe did not have layers instead once the mutton was cooked, all of the rice was added on the mutton and cashew nuts and raisins were added. Then the biryani was cooked on dum.
Place a tawa on heat and keep the covered cooker on top of it and give the biryani dum on low heat for about 8 to 10 minutes.

Let it rest for some time before serving - I think Biryani tastes best when it rests an hour or two before serving. Our Mutton Biryani Nagercoil style is ready.


Celebrate Makar Sankranti with Black Sesame Delight


Makar Sankranti marks the day of the transition of the Sun into the zodiac sign of Capricorn and is the beginning of Uttaraayan. It is also a harvest festival and marks the beginning of spring and is so celebrated across states in India. Bonfires and kite flying are some of the rituals followed on Makar Sankranti. Across India, sweets are made using sesame seeds, sugar, jaggery, flour, rice, coconut, etc.
 
In celebration, I decided to make something with black sesame seeds. I was inspired to make this dessert after watching the TV show, The Chef and his Better Half. I switched to this show very late and could only catch the part where the seeds were ground to a paste and the resultant drink/dessert was a grey black color. Personally, I did not know of any dish which was of this color, so naturally I wanted to try something on those lines. Without any recipe to go by, internet was the only source and there I learned that black sesame is used in desserts made in East Asia. So after checking different recipes I learnt that some flour is usually used to arrive at a thickish consistency, coconut milk was another option and the nuts was an Indian touch.
 
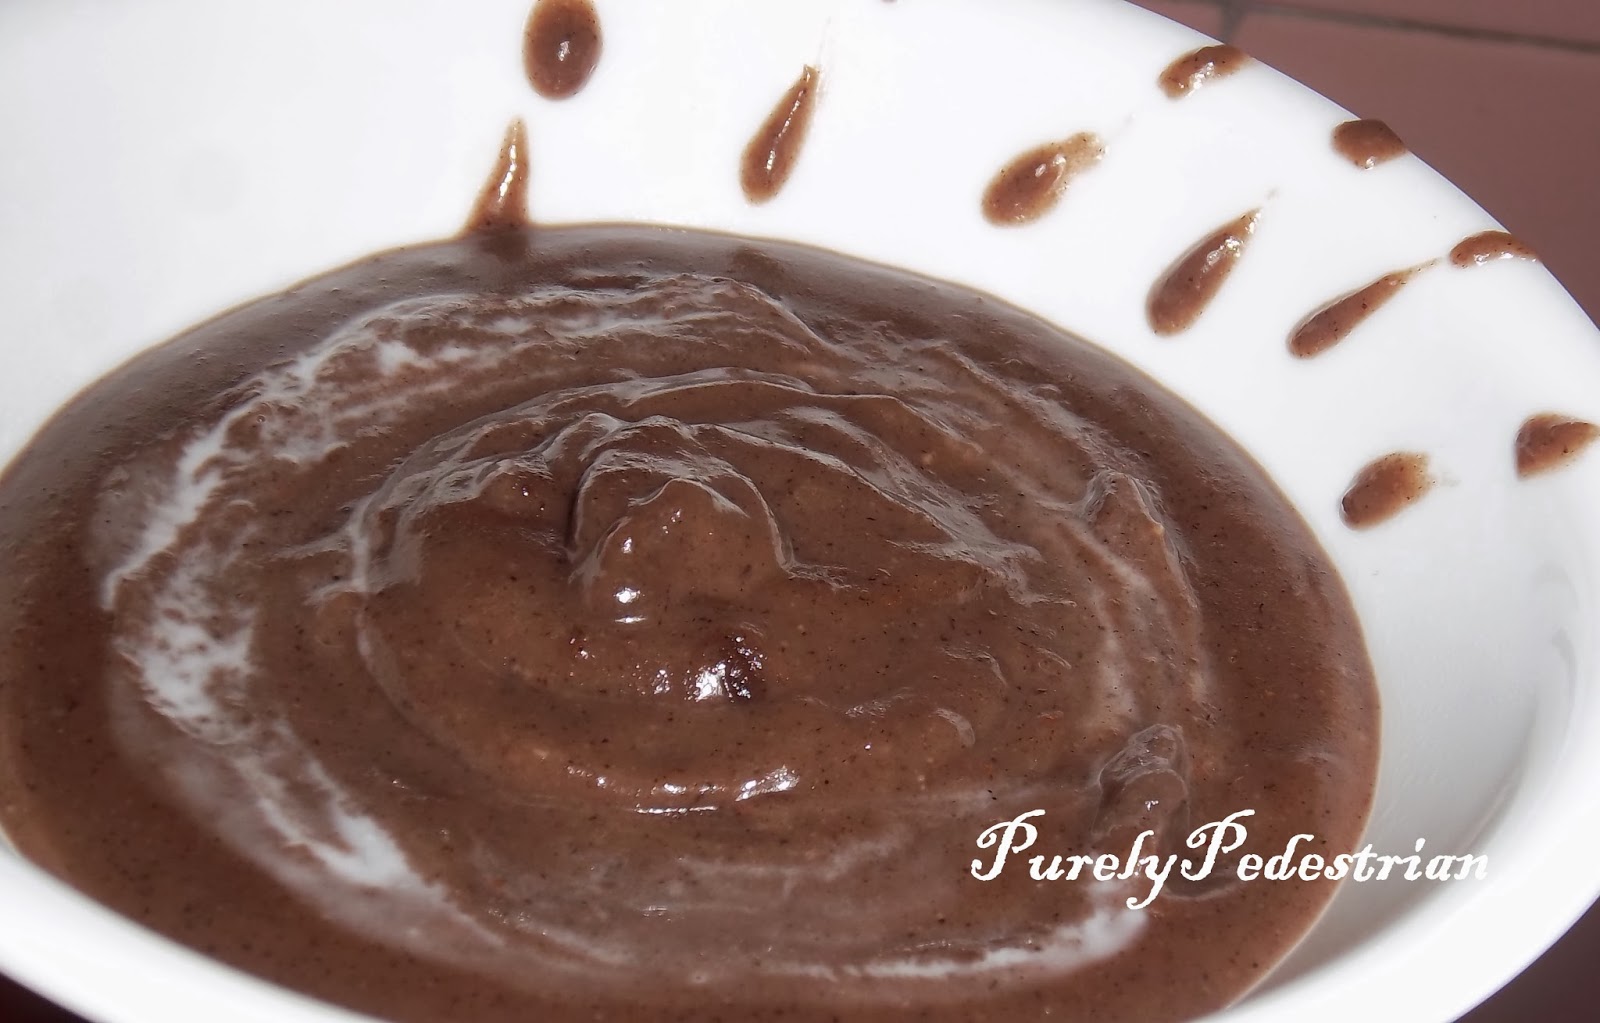
My Black Sesame Delight is a sweet dish with the consistency of porridge and should be had warm. It is mildly sweet with a distinctive nutty taste from the sesame seeds and looks like dark chocolate sauce and not the grey black I thought I may get. This warm dessert with a smooth consistency slips down the throat so easily and is nice to have on a winter day. After having some, I couldn’t keep away and kept dipping my spoon into the pan and by end of day had scraped it clean.
Without any more delay, here goes my recipe for Sesame Delight.
 
Ingredients
Black Sesame seeds – 5 tsp
Rice flour – 7 tsp
Almonds – 10 to 12
Coconut milk – ¼ cup
Sugar – 8 tbsp
Heat a pan and lightly toast the sesame seeds on low heat. The seeds will start popping, continue toasting for a few more minutes and take off the heat. Grind the sesame seeds and the almonds with a little water to a fine paste. It is alright to add more water if required.
Heat the pan and add a cup of water and add the rice flour to it. Mix well so there are no lumps. Add the sesame and almond paste and stir till it starts bubbling. The mix should be a thick pourable consistency add water if necessary to loosen it a little. Make sure to scrape down the sides of the pan where the rice and sesame mix congeals. Lower the heat and add the sugar and stir till it is mixed in.
Once the sugar has mixed in completely and it starts bubbling again, pour in the coconut milk and stir till completely mixed in.
As it cools the mixture tends to thicken so make sure the consistency is only just thick when taking off the heat. Take the Sesame Delight off the stove and let it cool to a warm temperature. Serve in bowls topped with slivers of nuts.


Saturday, January 11, 2014

Fermentation of foods in Winter

As long as we stayed in Mumbai, we just did not realize how the hot humid weather there helped us. No, I don't love the balmy sweaty weather for all its physical discomforts. But as they say, there are two sides to a coin. In this case, I just discovered the other side of coin.

In the hot and humid weather, it is so easy to ferment foods. For a South Indian, fermentation is an important step in cooking. And not being able to do it is very frustrating. I did not have to give a second thought about batters not fermenting, curds not setting, etc. Instead, sometimes I would have to worry about the batter not just fermenting rather souring. Then we moved to the US and we still did not have to consider these things because we were based in the South-West where it was warm. And from there we moved to the North-East and with that came a lot planning for these kinds of foods.
 
I learnt through experience that my dosa and idli batters don't ferment and curds don't set in the cold because temperatures don't cooperate. During winters, I learnt that, the batter rises if put into an oven overnight with the bulb left on. First, I would switch the oven on at minimum temperature for about 5 minutes then switch it off leaving only the bulb on. Then I would put the vessel (steel vessel) with batter in the oven and would check it only in the morning. So the minute I entered the kitchen I would check the batter and if it needed a little more rising I would switch it on for about 5 minutes again. This way the batter had some more time to rise till we were ready for breakfast.
 
The other way was to keep the batter near a heater vent. With each blast of heat from the vent the batter was on its way to a good bubbly rise. At my sister's place, the vent in the dining area was on the floor and we would place the vessel conveniently on it and the batter would rise beautifully in about 4 to 5 hours time. 
 
The same process can be adopted for setting yogurt or curd, again do remember to use a metal container and not a plastic one. I am speaking from experience - my plastic container melted and additionally, I had to clean all that spilt split milk. My over zealousness made me raise the oven temperature and right then I got distracted and forgot all about it. And I came back to a half melted container with white liquid dripping through the wire rack and collecting at the bottom of the oven.
 
Sprouting pulses is also not easy if the temperatures are low. Again, after draining the water, wrap the pulse in a moist cloth and keep in a container and keep this in an oven. Warm the oven at minimum temperature for a minute or two and the warmth and moistness will coax the pulses to sprout.
 
I am reminded of those days now, with winter having set in here. A few weeks, I ground some rice for appam and looked forward to a breakfast of soft  appam and stew. But, what I got instead was a flat thick dosa like pancake with no sponginess whatsoever. That reminded me of how I fermented the batter in the US and adopted the same here. So keeping the vessel with batter near the heater, in between gas burners and in the warmed oven, is now a regular feature. And yes, try and grind the batter in the morning, giving it enough time to perform! Now, my idli batter looks light and airy and I am smiling in glee.

This post is to all those who struggled, worked a way around and won, however small the victory!

Just ground idli batter

Fermented idli batter


Our breakfast - Soft idlis with coconut chutney and podi
 

Friday, January 10, 2014

Tendli / Tindora / Ivy Gourd Sabzi

When we moved to Delhi, we knew we were in for a different experience. Being Mumbaites, we did have our misgivings and preformed impressions about this city. Like any other place, this city does have good and not so good things about it. But, rather than go into a debate on the advantages and disadvantages of this city, I would like to write on my experience here. Like this vegetable; in Mumbai the ivy gourd is called the tendli. In Delhi when I went to the market and asked a vendor the price of tendli, he looked at me askance. So I just pointed to the ivy gourd / tendli and asked him it's name and then I was introduced to Kundru alias tendli. It sounded so funny to me, I just about stopped myself from laughing aloud.
 

And now, onto the recipe for tendli / kundru / ivy gourd sabzi. This goes well with roti and also with rice and dal.
 
Ingredients 
Ivy gourd / Tendli - 250 gms
Potato - 1, medium
Onion - 1
Coriander pwd - 1 tsp
Turmeric pwd - 1/2 tsp
Red chilli pwd - 1 tsp
Coriander leaves - 2 to 3 sprigs
Salt as per taste
Oil - 1 tbsp
Cut the ends of the ivy gourd and then slice it either lengthwise or in rounds. Dice the potato, chop the onion and coriander leaves and keep aside.
 
Heat a pan and add the oil. When the oil is hot add the chopped onion and saute till light golden. Add the turmeric, red chilli and coriander powders and saute for a minute. Add the diced potato, ivy gourd / tendli pieces and salt and stir. The onion masala should coat the tendli pieces well. Keep the heat on low and cover the pan with a deep plate. Add water in the plate and let the potato and tendli cook. Uncover the pan and stir the contents off and on so it does not catch the bottom of the pan. Cook till done and add the coriander leaves and stir. Take off the heat and keep covered till ready to serve. 
 
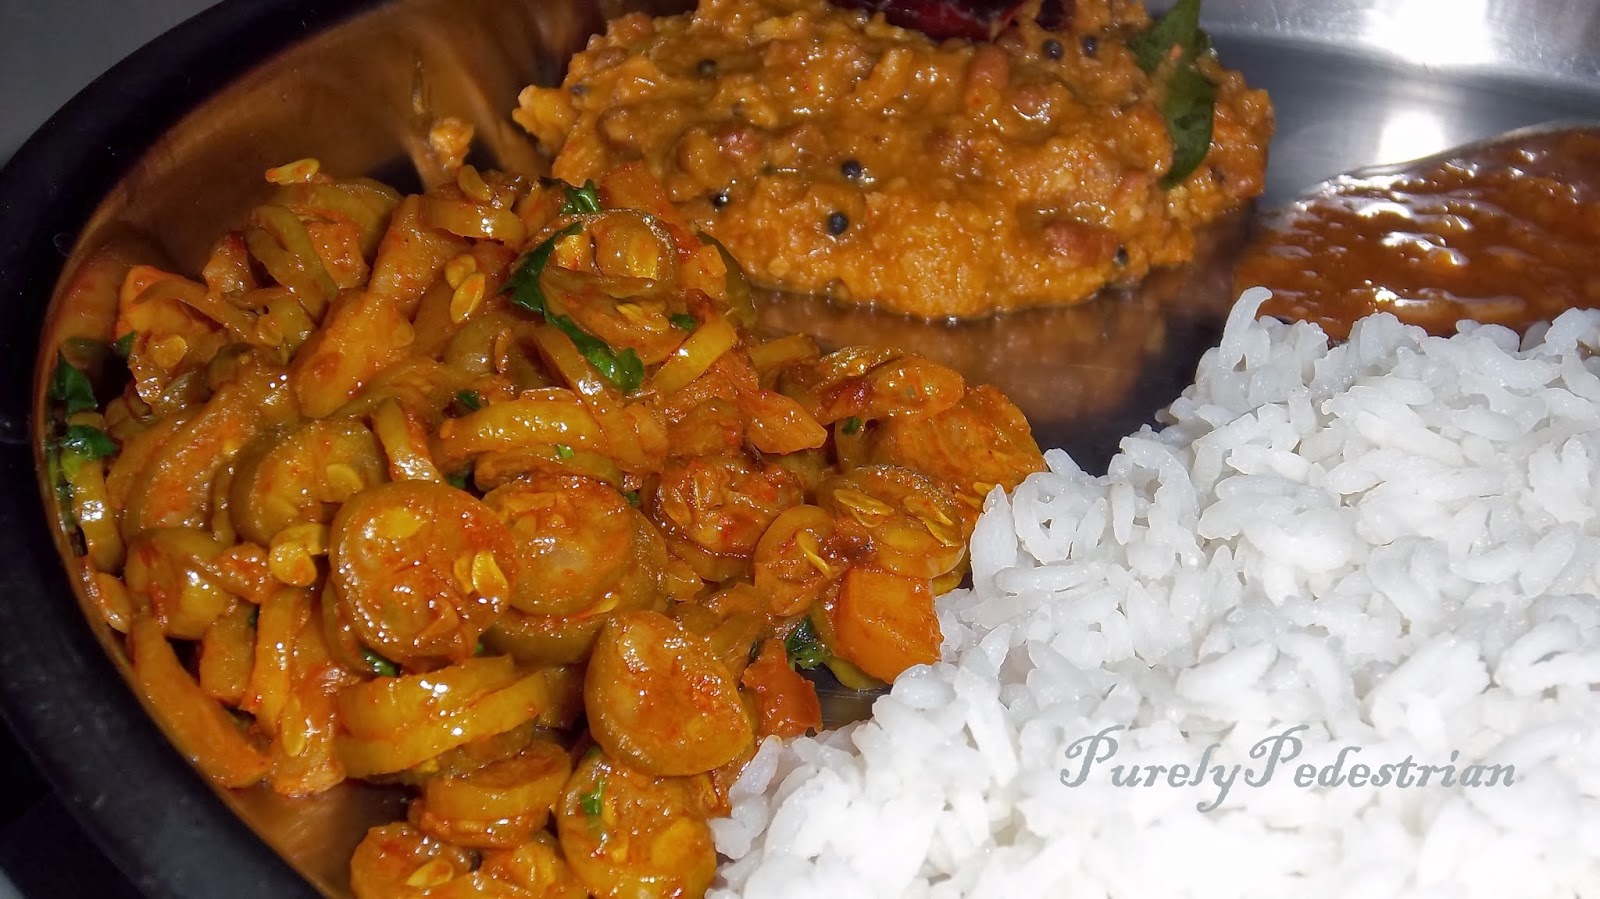
Tendli Sabzi served with rice, sambhar and erisseri

My Tendli/Tindora/Ivy Gourd Sabzi goes to
 - Lets Cook with Green Vegetables hosted by simplysensational food