Showing posts with label dessert. Show all posts

Tuesday, March 11, 2014

Honey flavored Bread Pudding with Raisins and Cashew Nuts

Bread Pudding is dessert made with a commonly available ingredient - bread. It is popular in many countries in Europe, the Americas', Australia .... Some versions of bread pudding include alcohol - bourbon, rum, some include honey, some others nuts, raisins, dried fruits, etc. Syrup and sauces are also added when serving, to enhance the taste further.   
 
Today, I have added honey and vanilla essence to flavor the pudding along with some cashew nuts and raisins for that extra bite. I also broiled it for a few minutes for a brown and lightly crisp top.
Ingredients
Bread slices - 7
Milk - 2 cup
Eggs - 4
Sugar - 1/2 cup + 1 tbsp additional (optional)
Honey - 3 tbsp
Butter - 2 tbsp
Vanilla essence - 1 tsp
Cashew nuts - 2 tbsp
Raisins - 2 tbsp
Preheat the oven to 180 degree Celsius. Take some of the butter and grease a loaf pan or square cake pan. 
 
Cut the crusts off the bread slices and cut into 1 inch square pieces. Put the bread pieces into the greased pan and pour the remaining melted butter into the pan. Reserve a few raisin and cashew nut pieces for topping and add the rest to the bread pieces.

In a bowl, add the milk, sugar, 2 tbsp honey and vanilla essence and mix. Break the eggs into the milk mixture and whisk with a fork till the sugar is mixed in. Pour this on the bread and using a spoon press the bread into the milk mixture till all the pieces are well soaked.
I used granulated sugar and depending on how sweet you want adjust the sugar.

Put the pan into the oven and bake for 45 minutes. After 20 minutes spoon the honey over the pudding and carefully spread it all over the top. Top the pudding with the reserved raisins and cashew nuts and continue baking. Once the 45 minutes is up, change the settings to broil and broil for about 5 minutes to get a browned top. Let it cool.
 
Cut slices and serve with honey and cream on the side.


Thursday, February 13, 2014

Maamoul / Cashew and Fig Stuffed Cookie

This Cashew and Fig stuffed Cookie is similar to the Maamoul or Ma'amoul from the Middle East. The Maamoul is a shortbread cookie with a sweet filling - most commonly dates and sometimes with pistachios or walnuts. This stuffed cookie is only mildly sweet unlike most cookies from around the world. A wide range of ingredients can be used as stuffing only that it should be dry so that the cookie dough is not moistened due to it. Today, I have used two different fillings to make these stuffed cookies - the smaller set with tutti frutti and the bigger one with fig and cashew nut mix.
This is a very easy recipe and all you need to do is measure the ingredients and make into a dough. And the stuffing can be of your choice and taste. But, truth said, my first batch of Maamoul did not turn out well - I used salted butter and it really tasted salty. Then the temperature and time I set my oven to was not right, it burnt my cookies. But I did another batch right away all the way through and managed to get it right. And now I have this recipe for keeps.
Ingredients
All Purpose flour / Maida - 2 cups
Powdered Sugar - 2/3 cup
Baking powder - 1 tsp
Butter, unsalted - 1/2 cup
Milk - 1/4 cup (maybe an additional 1 tbsp)
Oil - 2 tbsp
Salt - a pinch
Powdered sugar for dusting - 1/4 cup
for filling
Figs, dry - 8 to 10
Cashew nuts - 20 to 25
Tutti frutti - 3 to 4 tbsp
I used two different fillings today - plain tutti frutti for one and a mix of the figs and cashew nuts for the other. Wash the figs well and dry them. In a blending jar add the cashew nuts and powder it then add the figs and pulse a few times till the two are well blended. Take it into a bowl and keep till ready to use.

In a bowl, mix together the all purpose flour, baking powder, salt and powder sugar. Melt the butter but use it only when it comes to room temperature. Make a well in the dry ingredients and add the melted butter, oil and milk and with a soft hand make a ball of dough. This dough should not be over kneaded but just till the dough comes together.

Preheat the oven to 165 degrees Celsius.
Make equal sized balls of the cookie dough. I used a tablespoon measure to make 20 balls and then with the rest of the dough used a teaspoon measure to make 9 equal sized balls. Keep the dough balls in a covered container as you make the stuffed cookie. Take a ball of bough and massage between the palms into a ball then make an indent and put in the stuffing and pull the dough from all sides and cover the stuffing and softly roll in your hands to make it into a ball again. Flatten it slightly and place it on the baking tray. Do the same for all the balls of dough. Keep each of the cookies about 1 inch apart on the baking tray. Slide the tray into the oven and bake till the cookies are light golden which will take about 20 to 30 minutes. Place on a wire rack to cool and then dust with powdered sugar and store in an airtight container.


My Maamoul / Cashew and Fig Stuffed Cookies are going to
- Valentine's Treat hosted by riappyayan
- Lets Cook Sweet Treats for Valentine hosted by Nayna
- Flavors of the World - Grand Finale hosted by Nayna


Wednesday, February 12, 2014

Grilled Pineapple

Grilling meats and vegetables is common not so much fruits. But it is common to grill fruits in Caribbean cuisine. Pineapple makes for a great fruit to grill and only enhances it sweetness. Grilling fruits makes the sweet fruit sweeter and sharper, if that is possible.
 
This week at the weekly market there was vendor selling pineapples and thankfully cleaning them giving this lovely flower shape look. I try getting at least one different fruit each week and this week when I saw the pineapples, I was sure I had to get it. We normally enjoy it plain, but since I had the sniffles I wanted something warm to eat and that's when I thought of grilling it.
 
You don't need a recipe for this, all you do is put it on the grill and let the natural juices of the pineapple do the rest for you. I did brush a miniscule bit of salted butter on the slices before grilling both sides till the grilled lines was nice and dark. For a slight twist, sprinkle a little brown sugar and a pinch of cinnamon powder. Personally, I like it simple with no additives, just the sharp sweetness of pineapple. This Grilled Pineapple makes a great dessert especially for a larger crowd and when offering a range of desserts.


My Grilled Pineapple goes to Flavors of the World - Grand Finale hosted by Nayna.


Monday, February 10, 2014

Coconut Rose Sago / Tapioca Pudding

This Coconut Rose Sago / Tapioca Pudding is an adaptation of the recipe for Coconut Lilac Tapioca Pudding from the book, Cooking with Flowers by Miche Bacher. That recipe used lilac blossoms and candied lilacs. Since lilac is not a blossom we commonly use in Indian cooking, I substituted it with Gulkand which is made from preserved roses. This Tapioca / Sago pudding is thick and combines tastes of both the coconut milk and rose / gulkand.
Ingredients
Tapioca / Sago pearls - 1/2 cup
Coconut milk - 1 cup
Whole milk - 2 cups
Sugar - 1/2 cup
Gulkand - 3 tbsps
Rosewater -  couple of drops
Soak the sabudana or tapioca / sago pearls in 3/4 cup water for a couple of hours. Then drain the water, if any, and keep the sabudana or tapioca / sago pearls aside.
 
Take a saucepan and add the milk and sugar and let it come to a simmer then add the drained sabudana or tapioca / sago pearls. Cook on low to medium heat stirring it occasionally so the sago does not catch the bottom or stick together to a lump. It will take some time to cook. When the pearls start becoming translucent add the coconut milk and continue stirring occasionally till cooked. To check if it is done, take a sago pearl and bite it, it should be soft without a bite to it. Take off the heat and add the rose water and let it cool. Once cool add the gulkand and mix in. Refrigerate and serve garnished with rose petals.  
My Coconut Rose Sago / Tapioca Pudding goes to
- Cooking with Herbs & Flowers hosted by seduceyourtastebuds
- Valentine's Treat hosted by riappyayan
- Lets Cook Sweet Treats for Valentine hosted by Nayna


Saturday, January 25, 2014

Upside Down Peach Cake


For some time now, I wanted to make a cake incorporating fruits. Initially, it was the veritable treasure of fruits I saw in the market that got me thinking on these lines. A search on the internet gave cake recipes with apples, pineapples, apricots, peaches and pears. So when I saw tinned peaches in a factory outlet in Kasauli, I quickly bought one expecting to make some lovely desserts.

Ingredients
for caramelization
Butter - 1/4 cup
Brown sugar - 1/2 cup
for cake
Peaches, cut into slices - 2 large or 3 medium sized
Butter, softened - 1/2 cup
Sugar - 2/3 cup
Egg - 1
Flour – 1.5 cups
Baking powder - 2 tsp
Salt - 1/4 tsp
Milk - 2/3 cup
Vanilla essence - 1 tsp

Melt the 1/4 cup butter in 8 or 9" cake round (here I used a 7" x 11" baking dish and it worked just fine). Mix in 1/2 cup brown sugar and make sure entire bottom is coated with this mixture. Gently lay peaches in butter/brown sugar. I used tinned peaches, about 3 halves, both to line the bottom of the cake pan and chopped some to add to the batter.

Cream 1/2 cup butter and 2/3 cup white sugar until light and fluffy. Beat the egg in. In a separate bowl stir together flour, baking powder and salt. To the creamed mix, add the flour mix alternately with milk and continue beating. Finally, add the vanilla essence. If you have any left-over peach slices that didn't fit in the bottom of the pan, chop them up and add them to the batter. Gently spread the batter over peach slices, there will be just enough batter to cover the slices.

Bake at 175 degrees C for 30 to 40 minutes or until you have a lightly browned top. Check if the cake is done after 30 minutes and if not done bake for some more time. Once done, allow to sit for 5 minutes. Loosen cake edge with knife and invert onto serving plate. If you wait too long, it will stick to the pan. Or use a springform cake pan like I did and only the bottom needs to be loosened.


Tuesday, January 14, 2014

Celebrate Makar Sankranti with Black Sesame Delight


Makar Sankranti marks the day of the transition of the Sun into the zodiac sign of Capricorn and is the beginning of Uttaraayan. It is also a harvest festival and marks the beginning of spring and is so celebrated across states in India. Bonfires and kite flying are some of the rituals followed on Makar Sankranti. Across India, sweets are made using sesame seeds, sugar, jaggery, flour, rice, coconut, etc.
 
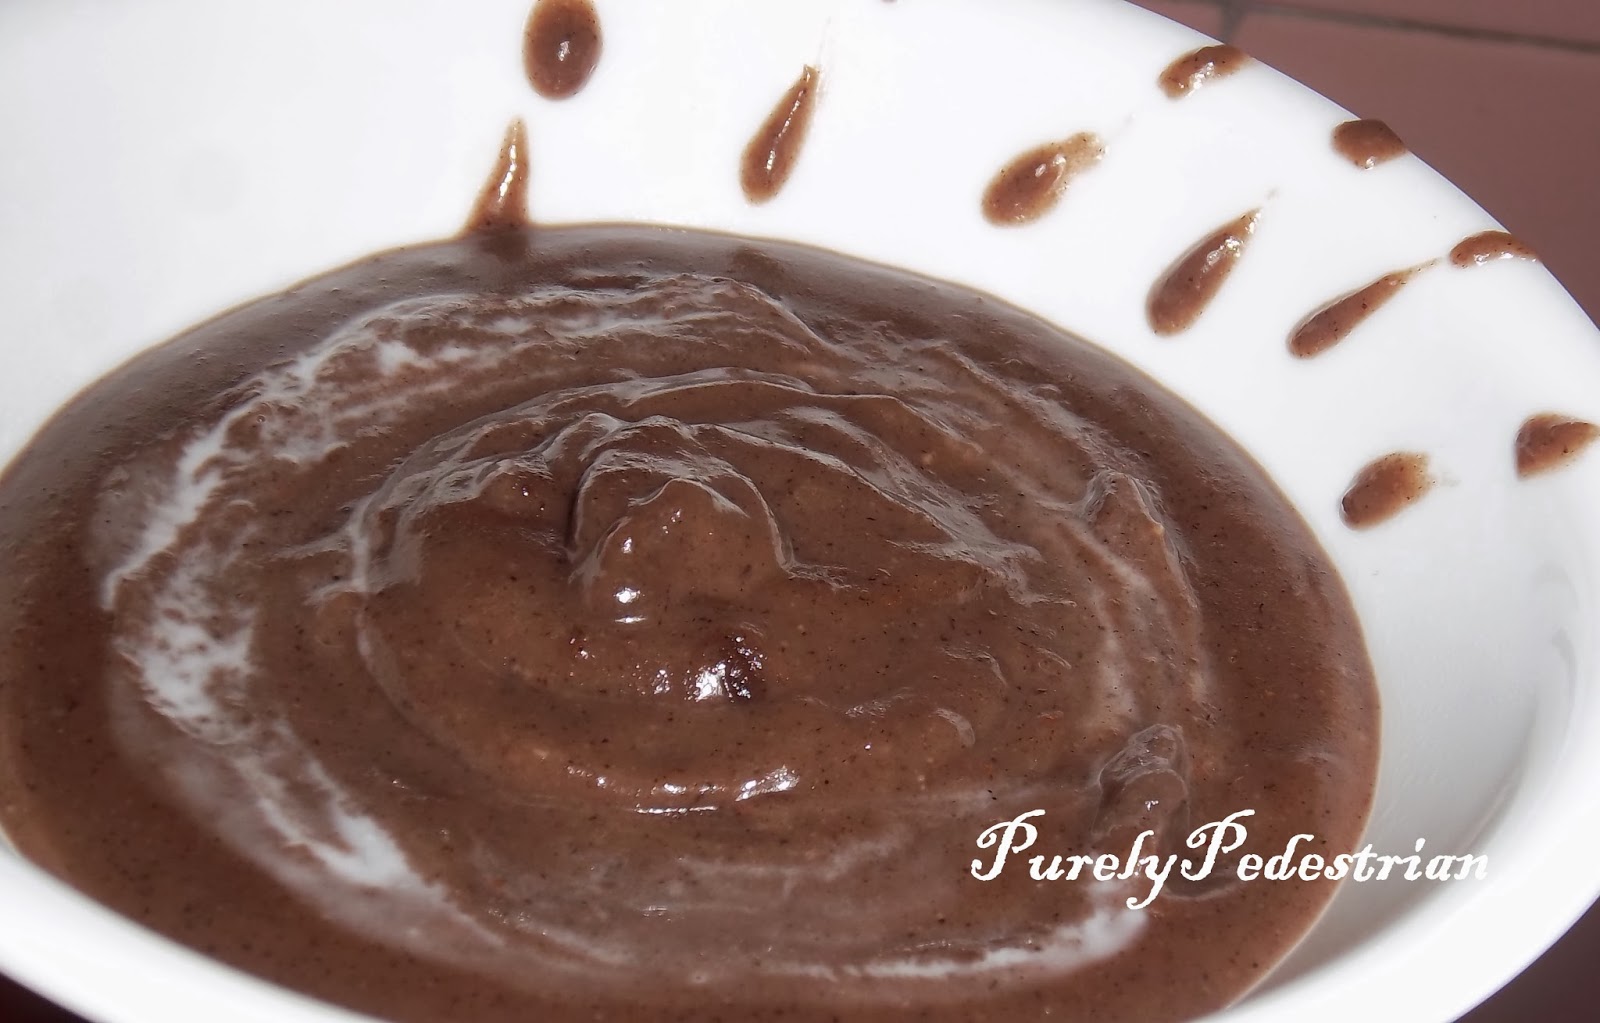
In celebration, I decided to make something with black sesame seeds. I was inspired to make this dessert after watching the TV show, The Chef and his Better Half. I switched to this show very late and could only catch the part where the seeds were ground to a paste and the resultant drink/dessert was a grey black color. Personally, I did not know of any dish which was of this color, so naturally I wanted to try something on those lines. Without any recipe to go by, internet was the only source and there I learned that black sesame is used in desserts made in East Asia. So after checking different recipes I learnt that some flour is usually used to arrive at a thickish consistency, coconut milk was another option and the nuts was an Indian touch.
 
My Black Sesame Delight is a sweet dish with the consistency of porridge and should be had warm. It is mildly sweet with a distinctive nutty taste from the sesame seeds and looks like dark chocolate sauce and not the grey black I thought I may get. This warm dessert with a smooth consistency slips down the throat so easily and is nice to have on a winter day. After having some, I couldn’t keep away and kept dipping my spoon into the pan and by end of day had scraped it clean.
Without any more delay, here goes my recipe for Sesame Delight.
 
Ingredients
Black Sesame seeds – 5 tsp
Rice flour – 7 tsp
Almonds – 10 to 12
Coconut milk – ¼ cup
Sugar – 8 tbsp
Heat a pan and lightly toast the sesame seeds on low heat. The seeds will start popping, continue toasting for a few more minutes and take off the heat. Grind the sesame seeds and the almonds with a little water to a fine paste. It is alright to add more water if required.
Heat the pan and add a cup of water and add the rice flour to it. Mix well so there are no lumps. Add the sesame and almond paste and stir till it starts bubbling. The mix should be a thick pourable consistency add water if necessary to loosen it a little. Make sure to scrape down the sides of the pan where the rice and sesame mix congeals. Lower the heat and add the sugar and stir till it is mixed in.
Once the sugar has mixed in completely and it starts bubbling again, pour in the coconut milk and stir till completely mixed in.
As it cools the mixture tends to thicken so make sure the consistency is only just thick when taking off the heat. Take the Sesame Delight off the stove and let it cool to a warm temperature. Serve in bowls topped with slivers of nuts.


Saturday, January 4, 2014

Condensed Milk Pound Cake

Condensed Milk Pound Cake served with grape crush and more condensed milk

This is a pound cake that includes the deliciously thick condensed milk and flavors of cardamom and vanilla. This cake has just the right sweetness and can take a sprinkling of icing sugar or that fruit syrup or condensed milk itself! I did try other recipes for condensed milk pound cake but did not get great results but this one is a runaway hit at our home. I referred to the Condensed Milk Pound Cake from this blog inspired from the book "The Sweet Spot" by Pichet Ong. The original recipe can be taken from there. Given below is the recipe I followed which has minor changes. 
Do give this cake a try and you will be a fan for life.

Ingredients
Maida / All purpose flour - 1 & 1/3 cup / 200gms
* Unsalted Butter - 1 cup / 226 gms (I used butter-1/2 c. & olive oil-1/2 c. less 1tbsp)
Condensed milk - 3/4 cup / 239 gms
Powder Sugar - 1/2 cup / 106 gms
Eggs - 3
Baking powder - 1 tsp
Vanilla essence - 1 tsp
Cardamom pwd - 1/2 tsp
* Salt - 1tsp
Preheat the oven to 160 degree Celsius. Grease and dust the cake pan you intend to use and keep aside till ready to use. I used my bundt pan, again, :) for this cake.
 
In a bowl mix maida, salt and baking powder and sift the three together. In a large bowl add the butter and oil and using a hand blender give a quick blend. Add the condensed milk and again give a quick blend. Add the cardamom powder to the above mixture. Then add the sugar and flour in two to three batches to the mixture and blend with the hand blender. In another bowl give the eggs a quick whisk. Add the beaten eggs to the above mixture blending quickly. Through this whole process try not to over blend, keep it just till the ingredients are incorporated. Add the vanilla essence and lightly mix with the hand till the whole batter is all mixed.
 
Pour this batter into the prepared cake pan and bake for about 50 to 60 minutes. Check if the cake is done by piercing the cake with a toothpick or knife after 50 minutes. The top of the cake will be a light gold when done. Let the cake cool completely before unmoulding.

Note: * Do not add salt if using salted butter.
 
I cut my cake when still slightly warm to beat my husband getting to it. Else I wouldn't get any pictures of the cake also.


My Condensed Milk Pound Cake goes to this event -
Holiday Baking by Ammaji Recipes


Tuesday, December 31, 2013

Ending 2013 on a Sweet Note - Gers Ogaily, a saffron cardamom flavored cake

We are at the close of 2013 and it has been a year that brought some good and some not so good things. Personally, my year has been a simple, unmomentous one and I close the year knowing my family and true friends are around and will be there for me through thick and thin. They are not physically near me but easily reachable with a big helping hand from all the technology available today. This year did bring more than my fair share of health issues, but now all of it is in the past and I look forward to the dawn of a new year bringing with it a bagful of experiences. I thank God for the gift of this year and ask for his blessings to make the next year a meaningful one. And wish the same for all of you.
And on this note, I would like to end 2013 on a sweet note with this cake called Gers Ogaily. Gers Ogaily is a traditional, saffron and cardamom flavored cake from Kuwaiti cuisine. This cake's taste is not an unfamiliar one to the Indian palette since a lot of our desserts use saffron and cardamom as flavoring agents. This cake is springy to the touch and is extremely soft with just the right amount of sweetness. I referred to the recipe given on this blog and can be referred for the original recipe. I added my touch to it and hence it is a modified Gers Ogaily.
 
Ingredients
All purpose flour / Maida - 2 cups
Caster Sugar - 1 1/2 cup
Unsalted Butter, melted and cooled - 1/2 cup*
Coconut Milk - 1 cup
Eggs - 4
Sesame seeds, toasted - 4 tbsp
Saffron - 1/2 tsp
Cardamom pwd - 1 tsp
Vanila Essence - 1 tsp
Rose Essence - 1.5 tsp
Baking pwd - 1.5 tsp baking pwd
Milk - 1 tsp
Salt - 1/4 tsp*
Preheat the oven to 180 degree Celsius / 350 degree Fahrenheit. Grease and dust the bundt / cake tin and keep aside. Powder the saffron with a pestle and add the tablespoon of milk to it and keep aside to steep.
 
Sift together the maida and baking soda and add the sesame seeds and cardamom powder and keep aside. Separately combine the melted butter, coconut milk, vanilla and rose essences, mix and keep aside. In a big bowl combine the eggs and the sugar. Beat it till the mixture is frothy and has tripled in volume. Fold in the maida mix and the butter - coconut milk mix little by little into the egg - sugar mix. When adding these, start and end with the maida mix. Once completely combined, pour into the prepared bundt pan. Sprinkle the rest of the sesame seeds on top and bake for 35 to 45 minutes. After 35 minutes, pierce a toothpick / knife into the cake to check if done. Depending on the oven you may need 35 to 45 minutes to bake this cake.
 
Like I mentioned earlier, the Gers Ogaily is mildly sweet cake. So when serving, feel free to sift some icing sugar on this cake.
 
Notes:
- All ingredients should be at room temperature unless specified other wise.
- If powdering cardamom in a mortar and pestle add a bit of sugar to make the powdering easy.
- Leave the saffron strands intact instead of powdering it if you like and continue to the next step of steeping it.
 - * If using salted butter omit the salt. I used Amul butter since getting unsalted butter in India is so difficult.


My saffron and cardamom flavored cake, Gers Ogaily, goes to this event -
Holiday Baking by Ammaji Recipes

Saturday, October 19, 2013

Tapioca Pearls / Sabudana and Almond Pudding

Tapioca pearls, as sabudana is called in the Far east makes for a good pudding because of its gooeyness when cooked. Sabudana is used widely in India, from sabudana khichdi to sabudana vada to sabudana payasam and also sabudana papad. This pudding recipe uses almond milk  with the sabudana and hence works for lactose intolerant people and vegans. But if getting almond milk is tedious, substitute the almond milk with whole milk and it tastes just as good.

I used home made almond milk for this recipe. Soak it for about 18 to 20 hours then wash it well and grind it whole - nuts and skin, to a fine paste. Add water to the almond paste as required to make a thick or thin milk. The milk will have brown specks from the almond skin but almond skin is not bitter or distasteful so it can be left in there. If you are really averse to it go ahead and strain and use.
This recipe also works for people on vrat / fast and would make a healthy dessert as well especially with almonds in it. It is a very mild pudding and relies on the flavor of the almonds and the rose essence to lift it up.
Ingredients
Sabudana - 1/4 cup
Water - 3/4 cup
Almond Milk - 3/4 cup
Sugar - 1/4 cup
Rose essence - 5 to 8 drops
Soak the sabudana in double the water for about 6 to 8 hours. If you are unable to soak for that long its ok it will only increase the cooking time a little. When ready to use drain the water out and keep aside.

Heat a saucepan, add the water and the drained sabudana and let it cook on very low heat. As the sabudana cooks the water is absorbed by it. Keep an eye on it so that the sabudana does not catch the bottom. When almost cooked add thick almond milk to it and mix well. Let it boil, check if the sabudana is cooked then add the sugar and mix it in. This pudding is not very sweet, you may want to adjust the sugar according to preference. Add the rose essence and mix it all well. Keep the pudding lightly liquidy because it thickens as it gets cool. More almond milk can be added if it gets too thick. Take it off the heat and keep aside.
 
Refrigerate it and serve it cold.
 
Update:
This recipe for Tapioca Pearls / Sabudana and Almond Pudding is going to these events :
-  "Diwali Special" hosted by gayathriscookspot.
-  "Diwali Bash 2013" hosted by cooksjoy.
-  "Diwali Delicacies Event" jointly hosted by priyaeasyntastyrecipes & spicytreats

Friday, September 27, 2013

Apple and Pear Compote

Compote is pieces of fruit cooked in a syrup with a few spices or flavorings like cinnamon, cloves, orange zest and sometimes even bits of nuts. Compote was a French dish originally and was served as a dessert along with cream. It is different from fruit preserves - 1. compote has whole pieces of fruit and 2. compote does not contain pectin which gives jams and marmalades its jelly like texture.
For me, I have always had a fancy for preserves. I have often bought preserves from stores and have stuffed myself with bread just so I could eat some of the preserves :) Another thing that fascinated me is the use of fruit sauces on puddings, ice creams and desserts in general. So, I checked for recipes and liked the idea of making compotes since it does not use preservatives and can be easily made at home with available ingredients.
 
During my last two trips to the weekly market, I saw these green apples that were going quite cheap as compared to the otherwise inflated prices. And the pears are also making a come back in the markets right now. I bought them both, some to be eaten raw and I wanted to give a compote recipe a try.
 
Ingredients
Apple - 1 cup
Pear - 1 cup
Honey - 2 tbsp
Cinnamon - 1/2 inch piece
Bay Leaf - 1 small
Lime essence - 1/2 tsp
Water - 1/4 cup (+3tbsp)
The apple and pear are to be peeled, cored and diced into small pieces and then measured. The size of the fruit will hence decide how much you need to use. It took me 1 apple and 1.5 pears to make a cup each. The recipe is quite simple, put all the ingredients except the lime essence together in a pot and mix well. Put the pot on low heat and cover and cook. When cooking, keep an eye on it so it does not catch the bottom and burn. The fruits should soften in about 15 minutes. Once done add the lime essence and take it off the heat. Remove the cinnamon stick and bay leaf.
The apple and pear compote is ready.
It can either be cooled, bottled and refrigerated to be used later as a topping on ice creams and puddings or can be served for dessert on it own. To serve, take a dessert goblet and spoon the compote till half full, top with whipped cream and a pitted cherry.

Wednesday, September 18, 2013

Semiya Kheer / Payasam

No sadhya is complete without kheer / payasam; in fact nowadays most sadhya in Kerala serves not one but two payasams - usually one milk based and the other coconut milk based. When payasam is served at a sadhya, it is served along with pappadam and pickle. It is said that having pappadam and pickle between mouthfuls of payasam helps in having some more payasam! Many people ask for the payasam to be poured on the banana leaf and then crush pappadam into it and scoop it all together. Most times it is a jaggery sweetened payasam that gets this treatment. I have never tried this but maybe sometime :)
At home, we make payasam on occasions like Onam, Vishu, and piranaals (birthdays) and it is either semiya or parippu payasam. This year for Onam, we made semiya payasam and for a change, I added saffron strands along with cardamom powder.
Ingredients
Semiya / Vermicelli - 100 gms.
Condensed milk - 1 tin (400gms)
Whole Milk - 1.5 ltr.
Sugar - 3tbsp (optional)
Cashew nuts - 20
Raisins - 20
Green Cardamom - 4
Ghee - 2tsp.
Saffron - 1/2 tsp.
Powder the green cardamom seeds finely. Warm a little milk and mix in the saffron and keep aside.
Heat a pan and add the ghee, when hot add the cashew nuts and fry till light brown. Scoop the nuts out, draining as much oil as possible and place on a paper towel. Add the vermicelli to the pan and sauté on low heat till light golden. Take off the heat and add the raisins in and stir for a minute, drain as much ghee as possible and put it on a paper towel and keep aside. 
 
Take a saucepan and boil the milk in it. Keep stirring it in between so that it does not catch the bottom. (I changed the vessel after boiling the milk because it did catch the bottom a little).  Once it boils, lower the heat and add the condensed milk and stir till it mixes completely. Add the roasted vermicelli / semiya little by little into the milk stirring all the while so it does not clump together. Add the cardamom powder as well and stir. It will take about 15 minutes for the vermicelli / semiya to cook on low heat. When the semiya has cooked, add the sugar (I added it because I found the payasam a little less sweet) and stir till mixed in. Add the saffron milk, cashew nuts and raisins and mix well. Take it off the heat. Serve hot or cooled in a frig.  
Tips:
1. Stir when adding the semiya and continue stirring in between else it will clump.
2.To powder the cardamom finely in a mortar pestle, add a teaspoon of sugar to the cardamom seeds when powdering. 
3. Sugar should be added only after the rice or semiya is cooked, else the milk may split.
4. Choose the thinnest vermicelli for payasam.

Update:
This Semiya Kheer / Payasam goes to these events
-  "Diwali Special" hosted by gayathriscookspot.
&
-  "Diwali Bash 2013" hosted by cooksjoy.

Saturday, September 14, 2013

Sheera / Sooji ka Halwa Naivedyam

Sheera / Sooji ka halwa is often offered at pujas as prasad. Since it is Ganesh utsav, I made this for naivedyam a few days back. It is not difficult to make sheera, just stick with the measurements and after making it a few times you will be able to make it on your own.
Ingredients
Semolina / Sooji / Rawa - 1/2 cup
Ghee -  a little less than 1/2 cup
Sugar - 1/2 cup
Water - 1.25 cups
Green Cardamom - 1 crushed
Cashew nuts - 8 to 10
Raisins - 8 to 10
Almonds - 6 to 8
Heat a pan or kadhai and pour the ghee after reserving a tablespoon. When warm add the cashew nuts and sauté it till light golden then take it out onto paper towels.
Separately heat water in a saucepan and add the sugar and the crushed cardamom to it. Let it boil well. Take off the heat and keep aside.
Lower the heat and add the sooji or rawa to the pan stir continuously so that it does not burn. Sauté till light brown. Add the raisins and the fried cashew nuts to this rawa, mix well. Raise the heat and pour the sugar - water mix into the rawa, stirring all the while. When the rawa starts coming together add the ghee that was kept aside and mix well. Cover and take off the heat when all the water is absorbed. Garnish with almond slivers.
Take it into a bowl and offer it to Lord Ganesha.

Prasad