Saturday, August 31, 2013

Sago / Sabudana / Tapioca Pearls Khichdi

Popularly known as fasting food or vrat ka khana, sago or sabudana khichdi tastes good and can be had on any day. It is a little difficult to get the sabudana khichdi right and only practice helps to get a perfect khichdi. And then sometimes the sago or sabudana ditches you and turns out to be powdery turning it into a gooey and stretchable mass. The only recourse then is to use the rest of the packet to make a so-so khichdi or add it to potato for vadas. When I started making sabudana khichdi it either turned out sticky or hard where suddenly we bit into a really hard one that questioned the health of our teeth.
After being through all of this I can now say that I do manage a decent to very good khichdi. And like my upma I make it, going by the look and feel when cooking.
Ingredients
Sago / Sabudana - 1 cup
Peanuts - 1/2 cup
Cumin / Jeera - 1tsp
Green Chilli - 3
Potato - 1
Salt as per taste
Sugar - 1/2tsp
Oil - 2tbsp
Put the sabudana in a container that holds about 3 to 4 cups. Give it a quick rinse and soak it in water - the water should be about 1inch more than the level of the sabudana. Check after about 30 minutes, the sabudana would have expanded a little, drain the water. Add some salt and fluff the sabudana with the help of a fork and keep covered for about 2 hours.
In a flat pan put in the raw peanuts and dry roast it on low heat, stirring it on and off. Take it off the gas when done and wrap it in a kitchen towel and rub it so the skin comes off. Discard the skin and crush the peanuts in a dry grinder. You can powder the peanuts incase you don't want to bite into the peanut.
Powder the cumin seeds in a dry grinder or with a mortar and pestle.
Peel and dice the potato into small pieces.
Heat a pan, add 1tbsp oil and on low heat fry the potato pieces till golden brown. Sprinkle a pinch of salt on it and scoop the potato pieces out. In the same pan add 1tbsp oil and when hot add the cumin powder. Stir it and add the green chilli and the sabudana. Stir it well and ensure its mixed well. Keep the heat on low and cover with a lid and let cook. After 5 minutes check the sabudana, it would not have cooked completely but it should be slowly turning translucent. If you feel the sabudana is drying up and is hardening instead of softening, sprinkle a little water (about 1 to 2 tbsp). Add the crushed / powdered peanuts, adjust the salt and mix really well. Cover and cook for another 2 to 3 minutes and check again. The sago is done when it has turned completely translucent and it should be completely soft when bitten into. It should take about 10 to 12 minutes for the sago to cook completely. Sprinkle the sugar and mix well then add the potato pieces and mix again. Take it off the heat and the sabudana khichdi is ready to serve.
 
Enjoy with some fruit slices
Tips I found useful:
1. Use a non-stick pan which is wide to easily spread and stir. It helps to keep the sabudana separate.
2. If soaking overnight then drain the water out but keep the sabudana moist and covered.
3. The crushed / powdered peanuts helps in keeping the sabudana dry and separate.
4. Crushed peanuts, green chillies and salt can be added to the sabudana 10 minutes before cooking and then added to the pan. This is another way.
5. Add a little extra peanut powder if the sabudana is soggy, peanut powder absorbs the excess moisture.
6. If the sabudana is dry or drying up - keep a bowl of water next to the stove and dip your fingers into the water and sprinkle this onto the sabudana. This ensures just a few drops get sprinkled.
 

Friday, August 30, 2013

Aiyla Varthathu / Talela Bangda / Mackerel Fry

Aiyla porichathundu, karimeen varathatundu..... goes a Malayalam film song proving the love Keralites have for seafood. I have always loved aiyla fry especially the way mom makes it. I have lovely memories of mom frying the fish at lunch time, with me at the table gorging on a hot piece of fish with a plate of rice, sambhar and thoran. Mom fries the Ayala fish to have a nice and crisp outer and soft flaky inside. Living in Mumbai during childhood meant we got a fresh supply of fish always. There were fish vendors who came to our door with fresh fish at about 9 or 10 in the morning and if we missed that then there was a fish market close by to stock from. But after moving to Delhi, we found that there are only a few markets that have good fish and INA market is one of them. The other day when I went to the market I found mackerels in the fish shop and immediately picked a couple. I was not sure of its freshness but the thought of having varatha ayala was already making my mouth water. Thankfully, the fish vendor cleans the fish and cuts it to the size of choice. All the aiyla then needed, was a quick rinse to clean and it was ready to be marinated. When I clean fish, I usually add turmeric powder to the water for the last rinse to take away some of the fishy smell.
We were so hungry that I didn't wait to take pics before dinner and there were only few pieces left after
For the marinade, I used the same spice mix that my mother does, with an additional dash of crushed garlic. I got the fish vendor to cut each bangda in 3 pieces and then made small cuts on each piece so the masala penetrates each piece nicely. The recipe:
Ingredients
Aiyla / Bangda - 4
Red Chilli pwd - 1 tbsp, heaped
Turmeric pwd - 1tsp
Black Pepper pwd - 1.5tsp
Garlic - 6 pods, crushed
Salt as per taste
Oil - 5 to 6 tbsp
Prepare the marinade by mixing the powders together, add a few drops of water to make a thick paste. Rub the marinade paste onto each piece of fish on all sides and into the cuts. Let it marinate for at least 2 hours.
Heat oil in a flat pan and add the fish pieces, as many as the pan can hold with space left between the pieces. Keep the heat on medium and after about 7 minutes flip the pieces onto the other side. In case the pieces are thick, stand the pieces on all sides to cook well. It takes me about 15 to 20 minutes to cook each batch of fish alternating between low and medium heat.
 
Cheera thoran, cabbage thoran, fried fish, rice with rasam


Cabbage Thoran / Gobi sabji

The other day, my mother-in-law mentioned that she always kept cabbage in the frig because it stored well and was easy to prepare when people came over unannounced. That's true, the chopping does not take much time and the cabbage is a no-fuss vegetable that cooks quickly. In Kerala, the sabji is made in an easier than other ways. Cabbage has to be cut thin and fine and should be cooked only as much that it retains a slight crunch to it. The best thing of all, is that you can put in all the ingredients and leave it to cook without having to stir it. And it takes just about 10 minutes to cook.
 
Ingredients
Cabbage - 2 cups, tightly packed
Green chilli - 2
Curry Leaves - 4 to 5
Turmeric powder - 1tsp
Mustard Seeds
Salt - 1tsp
Oil - 1tsp
Coconut - 1tbsp, grated
Cut the cabbage in thin and fine pieces, wash it and put in a colander to drain. Heat oil in a kadhai and when hot, add the mustard seeds. When it splutters add the green chilli, curry leaves, turmeric powder, chopped cabbage and salt. Mix well and bring it all together in the kadhai and cover with a lid and cook on low heat. After about 10 minutes check to see if cooked and sprinkle the grated coconut and mix well. Wait for a minute and take off the heat. It is ready to be served. 
 
Cabbage thoran can be served with rice and sambhar or any other Kerala kootaan.

Thursday, August 29, 2013

Cheera Thoran / Lal Maat bhaji / Red Spinach veggie

Red spinach, also known as lal maat in Marathi, cholai in Hindi and cheera in Malayalam is a very healthy leafy vegetable. In Kerala, a thoran is made using the leaves and the tender stems of the Amaranth or it is added to dal (lentil) and coconut and made into a moloshyam / molagootal called cheera moloshyam. In both ways, the vegetable is very lightly spiced allowing the flavor of the cheera to stand out without being overshadowed. The thicker stems (thandu in Malayalam) of the cheera are saved to be added to avial / aviyal to be chewed on like the muringaka. In fact, an aviyal made of the cheera thand and chakka kuru (jackfruit seeds) with lots of coconut was a delicacy at my grandparents place. Personally, I love the cheera whichever way it is cooked; the taste along with its color has always made my mouth water. When I was small I always wanted a little curd rice / thayirsaadam when there was cheera thoren, just to see the color contrasts in my plate.
 
The leafy vegetables we get in India are not cleaned and usually have the roots intact with the mud and dirt on them. It is hence necessary to rinse them a few times in clean water. Cut off the roots and pluck the leaves and the tender stems out for this preparation. As much as possible rinse each leaf carefully in water, changing the water a few times. You will actually see the grime that collects in the sink when doing this. Keep the amaranth leaves in a colander to drain the water and after 10 minutes chop them up.
Ingredients
Amaranth / Lal Maat / Cheera - 3 cups, chopped
Mustard Seeds - 1tsp
Curry Leaves - 4-5
Green Chilli
Onion, small - 1/2
Coconut - 3tbsp
Turmeric pwd - 1/2tsp
Oil - 1tsp
Salt as per taste
Heat a kadhai and add the oil when it is hot add the mustard seeds into it. When the mustard seeds splutter, add the curry leaves and then the turmeric powder. Immediately, add the chopped amaranth leaves and salt and mix well. Cover the kadhai with a lid and cook on low heat.
Add the green chilli, onion and coconut to the blender and give a quick whisk only to crush it well. When the cheera is almost done, add this crushed mix and stir it in. After a couple of minutes, turn the heat off and the thoran is ready to serve.
Like all  leafy vegetables, cheera is also full of vitamins and minerals and is purportedly healthier than spinach also. Popeye would have been stronger had he gulped Amaranth instead of spinach. Cooked amaranth leaves are a good source of vitamin A, vitamin C, and Folate. Cheera is also a complementing source of other vitamins such as thiamine, niacin, and riboflavin, plus some dietary minerals including calcium, iron, potassium, zinc, copper, and manganese.

This Cheera Thoran recipe goes to "Side dish mela", hosted by cooking4allseasons.

Sunday, August 25, 2013

Apple Date Smoothie

Continuing with my smoothie / shake series.... this is a new one. The other day when we were in the market and saw our fruit vendor had some good wet dates. They were cleaned ( though I do still rinse them before using) and packaged in neat 500gm packets. I took a liking to dates from my mother-in-law; she would buy it from the local market and would give us about 4-5 cleaned ones most days. Then later when I started baking I loved the idea of adding dates in cakes not restricting myself to only the date and walnut cake. So, unexpectedly, we bit into a sweet as ever piece of date when eating my pound cake as well :)
 
And now to get back to my smoothie, this is a great smoothie to have for breakfast or even as that mid morning or evening pick me up. Instead of giving into the temptation of a snack or chocolate or even coffee try this smoothie, it will assuage the hunger pangs and sweet cravings. The apple, dates and almonds (how could I leave it out!) blend really well making this a tasty smoothie. As for the benefits, it's numerous, find the benefits for the apple and almonds here. And the dates, it is rich in fiber, iron, calcium, fluorine, potassium, copper, manganese, magnesium, Vitamin K  and Vitamin B6. It contains simple sugars like fructose and dextrose which replenish the energy and revitalize the body instantly being one of the reasons that it is used to break fasts. Dates promote digestive health and relieves constipation thereby promoting colon health. It is also believed to boost heart health and reduce the risk of stroke due to the presence of magnesium in it. Magnesium is also believed to help in controlling blood pressure and dates have a high content of it. Vitamin B6 is shown to boost brain performance increasing test scores. Dates also contain antioxidants known as Tannins, known to possess anti-infective, anti-inflammatory, and anti-hemorrhagic properties. But yes, be warned of the high sugar content, it has an unbelievable 66.5gms of sugar per 100gm serving. So watch the amount of intake.
 
Ingredients
Almonds - 8 to 10
Apple - 1
Dates - 4 to 5
Milk - 3/4 cup
Soak the almonds for about 4 to 6 hours. Deseed and chop the dates and soak it in the milk for a couple of hours in the frig. Refrigerate the apple.
Discard the water in which the almonds were soaked and grind it to a fine paste. Then add the dates soaked in milk and again grind it finely. Next chop the apples and add it to the blender. Once finely blended pour it into a glass and it is ready to serve.
For a vegan version, increase the amount of almonds and grind it finely with water to make almond milk. Substitute the milk with the almond milk and a vegan version of the same smoothie is ready.
Blend the apples last just before serving to avoid browning due to oxidization.

P.S. And I forgot to take pics!
 

Saturday, August 24, 2013

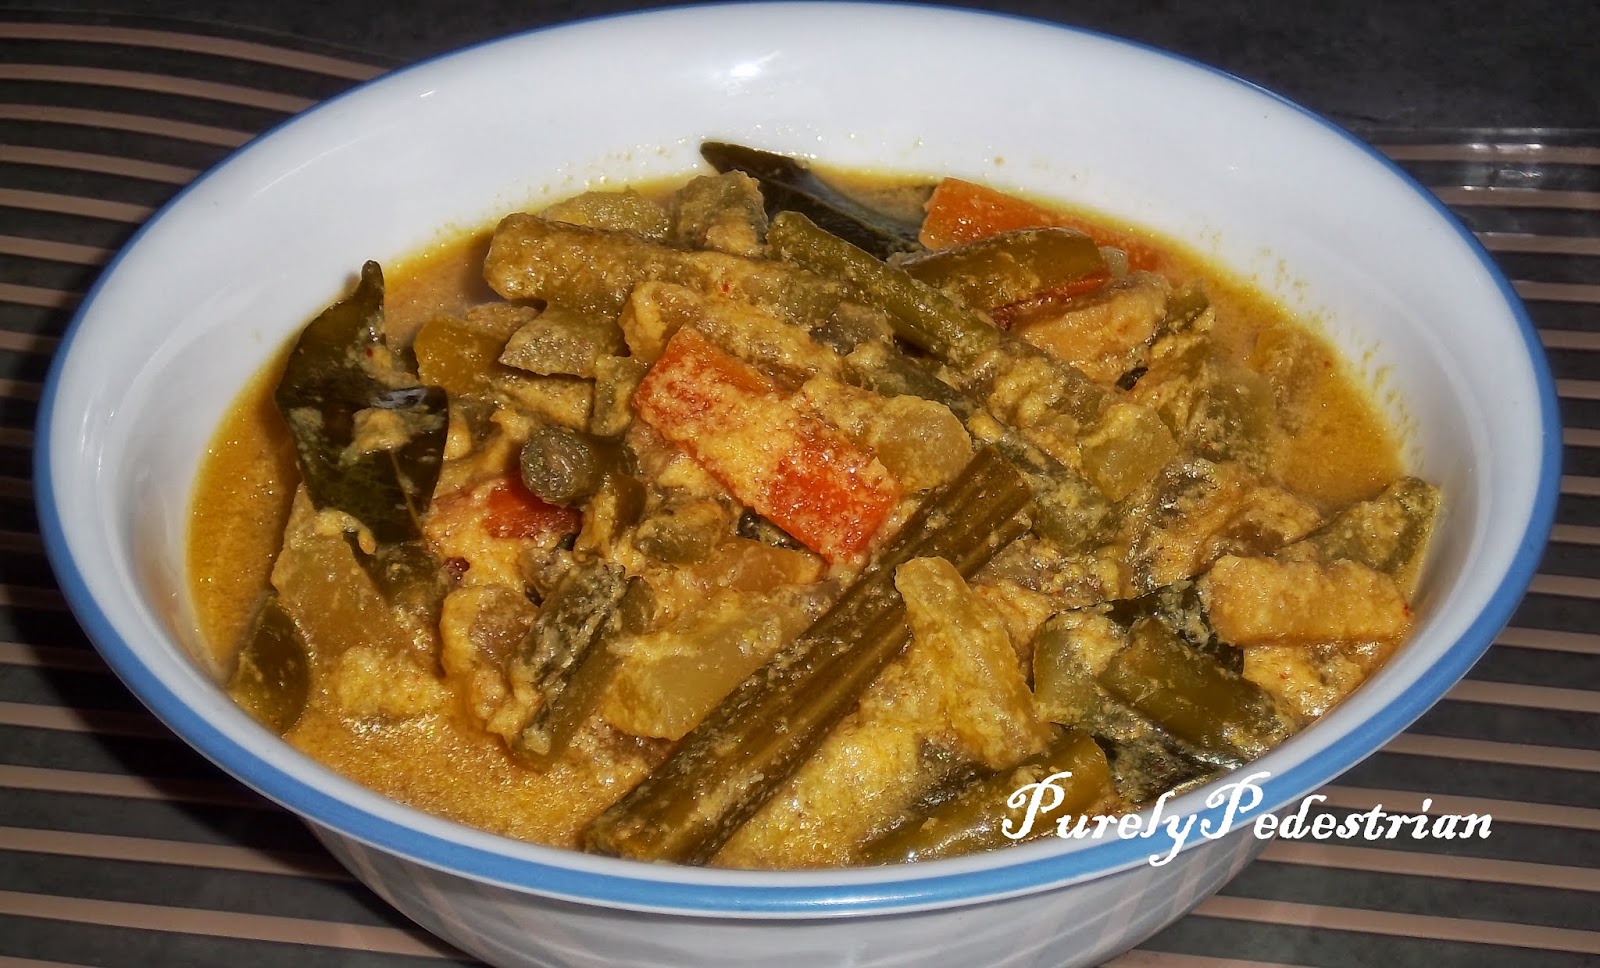
Avial / Aviyal from Kerala - a medley of mixed vegetables in coconut

Avial (aviyal), is a vegetable medley in a coconutty gravy straight from Kerala. It is a dish made on festive occasions and a sure shot item on an ela / ila sadya (feast served on a banana leaf). The avial / aviyal has many vegetables that is not used regularly in many cuisines. Many non-traditionalists use vegetables like potatoes and green peas and cauliflower in this dish which then frankly ceases to be avial and is just a vegetable curry in coconut gravy. At times, we have to substitute certain veggies due to non-availability; like most times vellarika is not available. Then either do without it or use a water heavy vege like bottle gourd or just increase the quantity of kumbalanga. Vegetables like the ash gourd, snake gourd, drumstick, yam, raw plantain (banana), yard long beans are usually the main ones that go in Avial, then additional ones like the ivy gourd, carrot, beans, eggplant are also added. This time, I did not add raw plantain to my avial because the last time it turned to be very starchy, maybe because I selected the wrong type of plantain.
 
Making Avial / Aviyal takes a little prep time. All the vegetables are cut into 1.5inch long strips with the exception of the drumsticks which are cut into 2.5inch pieces. The vegetables are added into the pot in stages since most have different cooking times else it could turn to a mushy mix. You can add either  raw mango or tamarind or curd/yogurt to add sourness to the Avial. The Avial can be made either with a little watery gravy or as a thick, no gravy dish. I chose to make it a little watery so I could avoid making another curry / kootaan. Usually, for a sadhya, the avial is made as a thick, no gravy dish without onion but when making it at home you have the liberty to do otherwise.
Ingredients
Ash gourd / White gourd /pumpkin / Kumbalanga / Kumbalengya - 1.5 cup
Bottle gourd / lauki / Churayka- 1/2 cup (use Vellarika if you get)
Yam / /Elephants foot / Chenna - 1/2 cup
Carrot - 1/2 cup
Snake gourd / Padavalanga / Padavalengya- 1/2 cup
Drumstick / Muringaka/ Muringyakay- 1
Yard long beans / Payar / Achingya - 1/2 cup
Ivy gourd / Koveka / Kovekya - 6
French beans / Beans - 1/2 cup
Fresh Curd / Yogurt - 1/2 cup
Turmeric pwd - 1tsp
Red chilli pwd - 1/2tsp
Coconut oil - 1tbsp
Curry leaves - 15
for paste
Coconut - 2 cups grated
Onion - 1/2, small sized (optional)
Jeera - 1/2tsp
Curry leaves - 2-3
Wash all the vegetables really well. Each vegetable has to be cut into strips of the same size, about 1.5inches long. For the Ash gourd / Kumbalenga, the Vellarika / English Cucumber, the Bottle gourd / Churayka and the Snake gourd / Padavalanga discard the seeds and innards and then cut into strips. Cut the Drumsticks / Muringaka into 2.5inch long pieces and make a small slit on each piece. Beat the curds / yogurt with a little water and keep aside. Grind the coconut, onion, jeera, onion to a fine paste with water, then add the curry leaves and pulse it once quickly. In case making a thick, no gravy avial, add an additional cup of grated coconut and only crush the coconut do not grind it to a fine paste and follow the rest of the recipe.
 
Put the Yam, Carrot, Snake gourd, Drumstick, Yard long beans, Ivy gourd, French beans and Bottle gourd pieces into a pot along with salt, turmeric powder and red chilli powder. Add water to the level of the veggies and close the pot with a lid and keep on low heat. Check after about 10 minutes if the vegetables are half done. Then add the Ash gourd pieces and some curry leaves and mix well and again close the lid and continue to cook on low heat. The vegetables should be cooked while retaining shape and crispness. Add the coconut paste and add little water for gravy and give it one boil. Then add the beaten curds and mix well till well blended. Do not boil after adding the yogurt. Top with the remaining curry leaves and the coconut oil and cover till ready to serve.


Coconut Onion Chutney / Thengya Ulli Chutney

This is another chutney we make at home to go with idli / dosa / appam. Like I wrote in my previous posts, a small variation gives a totally different taste to chutneys. As the name reveals, it is a coconut / thengya (thenga)  chutney (recipe given here) with the addition of raw onion in it. I used the savaalla ulli in this coconut / thengya (thenga) onion chutney but for a more authentic taste use the cheriya ulli. This coconut chutney can be made with another addition as well - ginger. My mother adds ginger to make a coconut ginger chutney or a thengya inji chutney. Adding ginger gives a slightly curdled taste to this chammanthi / chutney so we don't make it at home because of my husband's aversion to any curdled / yogurty taste. In case, substituting the onion with ginger, add half an inch piece of ginger to this chutney to make a coconut ginger chutney.
Ingredients
Coconut, grated - 1 cup heaped
Onion - 1/2 small sized (if using cheriya ulli - 2 to 3)
Green chilli - 2
Salt as per taste
for varuthiddal / tadka
Oil - 1tsp
Mustard seeds - 1/2tsp
Curry leaves - 4-5
Dry red chilli - 1
Green chilli - 1
Grind the coconut, onion, green chillies to a fine paste with water and add salt as per taste. Pour it into a serving bowl.
Cut the red chilli in two and slit the green chilli and keep ready. Heat a small pan, add the oil, when hot add the mustard seeds. When it splutters add the dry red chilli, green chilli and the curry leaves stir it well and pour it on the chutney. After a minute, mix well and it is ready to be served.

Friday, August 23, 2013

Mutton / Gosht / Erachi Biryani

Biryani is my weakness and some days I crave for it and end up ordering it. Though recently we have not had a good biryani from the restaurants around here. Leaving me disappointed and with only one option - to make it at home. I love chicken biryani more than mutton biryani and normally make only chicken biryani at home. But this time I tried making this mutton biryani (considering my husband's weakness for it), with masalas made ground up without any use of ready made mixes. Usually, I have a stock of Shan Memoni Mutton Biryani masala and use that. But like all readymade masalas there comes a time when you have had enough of the same taste again and again and want a change. Added to that, comes the thought that all ready / branded masalas have additives and the only way to avoid them is to make masalas at home. The process is tedious hence I do not resort to it always. I looked up recipes of Pakistani biryani online and then proceeded to put together the ingredients for my mutton / gosht biryani. Largely, I stuck to the process given on the Shan Masala packet with a little changes.
 
When making this Mutton / Gosht Biryani I kept a pen and my diary on the kitchen counter knowing fully well, I would make adjustments on the go based on the taste and aroma of the dish. I made this Mutton / Gosht Biryani last night and I have to say I was very very happy with the results of this recipe. It is one of the best biryani's I have had to date. And yes, my husband loved it too.
Ingredients
Mutton / Gosht / Erachi - 500gms
Basmati Rice - 2 glasses
Onion - 4 medium
Ginger - 3inch piece
Garlic - 15 - 20
Green chilli - 2
Dry Red chilli - 4
Potatoes - 4 small to medium
Tomato - 1 medium
Fresh Yogurt / Curd - 2tbsp
Coriander leaves - 1 cup chopped
Turmeric pwd - 1tsp
Cloves - 8
Cinnamon - 3 (1 inch) pieces
Green Cardamom - 2
Black Cardamom - 2
Shahi Jeera - 1.5tsp
Jeera - 1/2tsp
Pepper - 5 to 6 crushed
Bay Leaf - 2
Saffron - 1 generous pinch
Milk - 2tsp
Salt to taste
Oil - 2tbsp
Ghee - 4tbsp
For the Rice:
Water - 3.5 glasses
Shahi Jeera - 1tsp
Jeera - 1/4tsp
Cloves - 4
Cinnamon - 1 small stick
Green Cardamom / Chhoti Elaichi - 1
Black Cardamom / Moti Elaichi - 1
Bay leaf - 1
Ghee - 1tsp
Start out with a few preparatory steps before the actual cooking, - wash and clean the meat and rub in with salt, turmeric and curd / yogurt and put it in the frig for an hour at least. Slice the onions, chop the tomatoes and keep aside. Peel the potatoes, wash, halve them and prick them with a knife and keep aside. Grind the ginger, garlic, green chillies and dry red chillies together and keep aside. Warm the milk and soak the saffron in it. Wash the rice and soak it in water.
I used my pressure cooker to cook this for two reasons - 1. I do not have a big vessel & 2. the pressure cooker has a thick bottom. Heat 2tbsp oil and 2 tbsp. ghee in the cooker, when hot add the shahi jeera, jeera, cloves. cinnamon, green cardamom, black cardamom, bay leaf and crushed black pepper. Stir it then add the sliced onions and fry till the onions turn translucent. Add the ground ginger-garlic-chilli paste and fry well. Keep stirring it so the mix does not stick to the bottom and fry till the raw smell of the ginger garlic has gone. Then add the marinated mutton and mix well. Saute it for about 10 to 15 minutes till you see the oil leaving the sides. Add the potatoes and stir to coat well with the masala mix. Then add the tomatoes and about half cup water and mix well. Let it boil once and check for salt, add some if needed and close with lid and cook till the mutton is done.
 
Separately, cook the rice to be done in time with the mutton. Boil the water and then add the shahi jeera, jeera, cloves, cinnamon, bay leaf, green and black cardamoms, salt and ghee. Stir it once and then add the rice. Stir the rice so it does not stick to the bottom. The rice has to be only 3/4th done. I did not want to drain the flavorsome water hence put less water and kept checking if more water was needed to get it to 3/4th done level. Once the rice is done take it off the gas and fluff it so it does not stick together. I took it out in a bigger vessel so I could spread it out a bit without clumping.
 
Assembling:
Scoop the mutton and its masala out leaving back as much oil in the cooker as possible. Divide the rice in half and layer one half of the rice in the cooker. Then sprinkle half of the coriander leaves on top of it. Put in all of the mutton on this layer and spread out evenly. Then layer the rest of the rice over the mutton and spread it out. Sprinkle rest of the coriander leaves on the rice. Spoon the balance 2 tbsp. ghee on the sides and top of the rice. Then sprinkle the saffron and milk over it and shut with the lid. I put the cooker on top of my tawa and put it on low heat for about 10-15 minutes. Take it off heat and leave it for sometime ideally an hour or so to give time for all the taste to be absorbed.
 
Serve the biryani with raita / yogurt and salad.

Thursday, August 22, 2013

Urllakizhangu / Kizhangu Ishtew / Kerala Ishtu / Potato Stew

This stew is normally made to go with Appam for breakfast in many Malayali homes. Appam ishtew is a typical breakfast item from Kerala. Although nowadays this breakfast is mostly limited to weekends since weekday mornings mean rushed breakfasts. Appams can be paired off with chutney or potato stew or vegetable stew or egg roast or a varutharache curry (egg or vegetables). We mostly make urllakizhangu or kizhangu ishtu / ishtew (that's potato stew in Malayalam) at home, a practice that my mother-in-law follows. And a combination I have fallen in love with.
My mother makes an orange colored coconut chutney to go with appams at home. And after marriage, I have mostly made potato ishtew to go with the appam. This ishtew is different from the one prepared for a sadya (feast served on a banana leaf) in the sense that this has onions and is watery. The best thing about making potato stew is that you pile everything into the pan and leave it to cook without having to add ingredients (except coconut milk) in stages. So here goes the recipe:
Ingredients
Potato - 2
Green chillies - 2
Ginger - 1 inch
Coconut milk (thick) - 1/2cup
Curry leaves - 8-10
Coconut oil - 1tsp
Salt as per taste
Peel the potatoes, wash it and slice it into pieces, slit the green chillies, cut the ginger into juliennes and keep aside. Heat a pan add about a cup of water and add the potatoes, ginger, green chillies, curry leaves, a little salt and cook on medium heat. Check after about 10 minutes if the potatoes are almost done. Make sure the pan still has water and add 1 tablespoon of coconut milk and cook on low heat till the potatoes are completely done. Then add the rest of the coconut milk, adjust with more water if needed and let it come close to a boil. Drizzle coconut oil and a few curry leaves on top, close the lid and take off the heat.
Get the appams ready and serve the ishtew with it.
Tips:
If using full coconut milk from a can or tetrapack, water it down (3 coconut : 1 water).
The lite coconut milk can be poured straight to the cooked potatoes.
 

Vella Appam / Hoppers

... and ishtew for breakfast on a lovely relaxed weekend morning. Vella appam or hoppers is a favorite Kerala breakfast item. The extensive use of coconut in Kerala cuisine continues to be seen in the vella appam recipe as  well. Grated coconut is added when grinding the batter giving the appam a coconutty and slightly sweet taste to it. In Kerala, many families use toddy to ferment the batter; although it is a delicacy the taste takes getting used to. Our family has always added coconut water when grinding and later added soda to the batter in the morning before making the appam. One reason for that could be that my grandfather was a teetotaler and hence I guess toddy being brought home was ruled out.
Appam is paired off with quite a few accompaniments - chutney, potato stew, vegetable stew, mutton stew, motta / egg curry. And if you check the recipe of these dishes you will find more coconut! The Appam recipe that I follow was given to me by my mother after I shifted post my marriage. I follow it to the T and this recipe has always worked for me. This vella appam recipe requires coconut water which I collect from the coconuts I use at home. This can be stored in an airtight container in the frig for about a week. So every time you crack a coconut carefully collect the water and store it. In case you do not use coconuts and/or don't have coconut water, use plain water to grind.
Recipe Ingredients
Rice, uncooked  - 1 cup
Rice, Cooked  - 1/4 cup
Coconut, grated - 1/2 cup
Coconut water
Sugar - 1 tsp heaped
Salt as per taste
Water (optional)
Baking Soda - 1 pinch
Wash the rice and then soak it for 4 to 6 hours. Add the sugar and 1tsp salt to the coconut water, mix well and keep aside. Grate the coconut just before grinding the batter and keep aside.
Use a blender that can grind finely when doing this batter. Drain the uncooked rice and add it to the blending jar along with the cooked rice, grated coconut and coconut water and grind it. In case you do not have enough coconut water add some plain water to get a thickish batter. Adjust the salt and pour it into a container to be kept in room temperature overnight.
In the morning about an hour before you start making the appam, add a pinch of soda to the batter and mix well and keep aside.
the batter after adding the baking soda in the morning
When ready to make the appams, take a appam chatti - a vessel  like a medium sized kadai with a lid and heat it. Apply oil on the complete surface and spread it using half an onion. Then pour a ladle full of batter in the center of the chatti and slowly swirl it around spreading the batter in a circle. Sprinkle some oil on the sides of the appam and close the chatti with a lid. After about 30 seconds open to see if done. You should have a shiny, cooked, spongy looking top at the center and that is when it is ready to be served on a plate.

Spoon some potato ishtew on to a plate, add an appam and you have your yummy breakfast.

Notes:
- Add the sugar and salt to the coconut water to aid fermentation. In case using plain water to grind, add the salt and sugar when grinding.
- I prefer using a steel container and keeping it in the kitchen which is the warmest place in my house (room temperature is usually between 28 to 35degrees Celsius).
During winter keep this batter in the oven with the small bulb light on.
- An aunt of mine said when scooping the batter to pour onto the pan, take only the top layer that is the bubbly layer. Supposedly it gives the appam than fluffed sponginess. I have not tried this but maybe it helps.

P.S. I had to make my appam early today and I did not have time to prep my appam chatti and instead used my dosa kal, hence the dosa like appams!

Wednesday, August 21, 2013

Naadan Mutta Curry / Pacha Thenga Aracha Motta Curry / Egg Curry Kerala Style

Thenga-malee Pacha Aracha Motta curry is one of the ways we make Motta / Mutta / Egg curry at home. At my mother's place we make motta curry in a varutharacha (roasted coconut and coriander seed paste) gravy whereas my mother-in-law makes egg curry in a pachakarache gravy. Thenga mallee pacharacha curry means fresh coconut and coriander seeds ground to paste without roasting or frying. The taste changes so much with that simple roasting / frying of coconut and coriander seeds. Between my husband and I we have so many ways the same curries / kootaans are cooked because we come from different parts of Kerala. So we pick and choose which way to make it depending on the time and ingredients we have on hand. The difference in the motta kootaan is just one of them. Another difference was the way the egg was added to this curry - my mother boiled them and cut in half whereas my mother-in-law scrambled the eggs for this curry.
My husband and I make motta curry in pacharacha gravy when we cannot think of kootaan options to go with rice for dinner. This kootaan pairs off well with rice and a mezhukperatty and doesn't take much time to make as well. In fact, time is one of the reasons we make this thenga and malee pacharacha kootaan. In Kerala, the egg curry is paired off with appam or dosa and had for breakfast. Though that is usually an egg roast or a varutharache motta kootaan. Substitute the motta with vegetables for a vegetarian version of a typical naadan curry.

Ingredients & Method
for scrambled eggs
Eggs - 4
Oil - 1tsp
Salt - as per taste
Heat a kadai / pan and add the oil. Swirl it around to coat completely. When the oil is hot, break the eggs into the kadai, sprinkle some salt over it and beat well till the eggs are scrambled. Try and keep the eggs in medium to big pieces since small pieces tend to disintegrate once added to the curry.
for gravy
Coconut grated - 1.5 cups
Coriander seeds - 3tbsp
Dry Red chillies - 4
Onion - 1 medium
Ginger - 1 inch
Green chillies - 2
Tomato - 1 medium
Turmeric pwd - 1tsp
Curry leaves - 2 sprigs
Coriander leaves - 1tbsp
Oil - 1tbsp
Coconut oil - 1tsp
Slice the onions, cut the ginger into juliennes and chop the tomato finely and keep aside. Grind the grated coconut, coriander seeds and dry red chillies to a fine paste.
Heat a pan and add the oil. When the oil is hot add the sliced onions and stir fry it. Once the onions are translucent add the ginger juliennes and  some curry leaves and continue frying. When the onions are golden brown add the coconut paste and fry for a couple of minutes. Add the turmeric pwd and stir and mix well. To this add the chopped tomatoes, green chillies, salt and little water and stir all in. Add some more curry leaves and water to make it into a thick gravy. After one boil add the scrambled eggs and cook for a minute or two. Drizzle the coconut oil on top, garnish with coriander leaves and close with lid without stirring and take off the heat. Mix well just before serving.
Have this with rice and mezhukperatty.
 

Tuesday, August 20, 2013

Jhatpat Masale Bhat / Masala Rice

Masala Rice or Masale Bhaat is one recipe that we all resort to when we run out of ideas for a meal. It is one recipe that does not take much time and can be made in a jiffy, especially to be packed into lunch boxes. This is a simple recipe that bachelors / first time cooks can rely on to have a filling and wholesome meal. The Masale Bhaat is an easy to pack dish for an overnight train travel as well since it can be had on its own alongwith some curd/ dahi that can easily be bought from any stall at the station too. The best thing about this recipe is that slight variations in the spice and/or vegetable combinations gives you a different taste altogether.
 
The easy-peasy way I like to make Masala Rice is given below:
Ingredients
Rice - 1.5 cups
Onion - 1 large
Carrot - 1
French Beans - 5
Green Peas - 1tbsp
Tendli - 4
Green chilli - 2
Tomato - 1/2
Ginger - 1tbsp chopped
Garlic - 1tbsp chopped
Coriander pwd - 1tsp
Turmeric pwd - 1tsp
Red chilli pwd - 1/2tsp (optional)
Oil - 2tbsp
Salt to taste
Coriander leaves - 1tbsp chopped
Whole Spices
Shah jeera - 1tsp
Jeera - 1/2tsp
Green Elaichi - 1, only skin
Black elaichi - half, seeds only
Cloves - 2-3
Cinnamon - small piece
Slice the onions, keep aside and chop the carrot, beans and tendli in 1 inch size pieces. Chop the tomatoes finely.
Heat the oil in a pressure cooker, when hot add the whole spices. After a minute add the sliced onion and fry till translucent then add the ginger and garlic and continue to sauté. When the onions are light brown add the coriander powder and stir for a minute. Then add the vegetables and the green chillies. Keep sautéing and add the turmeric powder, red chilli powder (if using) and salt and mix well. Add the rice into this mix and sauté for a few minutes. Add 3 cups water and let it boil, check the taste and adjust salt and chillies. Put the lid and whistle on and let it cook for in pressure for 2 whistles. Open when the pressure has escaped and garnish with the coriander leaves.
The Masala Rice goes in my lunch box along with curd/dahi, cucumber sticks and an apple making it a nice half-day meal.

Mixed Vegetable Khichdi

The khichdi is a wholesome meal, usually had when unwell and the digestive system is not functioning to its fullest extent. It is a rice and moong dal mushy dish which is easily digestible making it ideal food for children as well. But this dish can be transformed to a one meal dish with the addition of vegetables and some aromatic spices. Whole moong adds additional fiber also. In fact, the Bengalis make their khichdi with vegetables and spices.
 
I remember a friend telling me "khichdi ke chaar yaar - papad, ghee, kadhi aur aachar", or something of that sort or maybe in a different order. These accompaniments add that extra zing to this meal.
Ingredients:
Rice - 1/2 cup
Whole Moong - 1/4 cup
Onion - 1 small chopped
Carrot - 1/2
Beans - 4-5
Green peas - 1 tbsp
Ginger - 1tsp chopped
Garlic -1tsp chopped
Green chilli - 2
Turmeric pwd - 1/2tsp
Salt to taste
Ghee - 1 tbsp
Water - 1.5 cups
Spice
Bay Leaf - 1
Black Elaichi - 1
Jeera - 1/2tsp
Dhania pwd - 1/2tsp
Soak the rice and moong in water for about 1 hour .
Heat the pressure cooker and add ghee into it. When hot, add the bay leaf, elaichi and jeera and let it splutter. Then add the chopped onions and stir for 2 to 3 minutes after which add the ginger and garlic. Let it fry well till light brown. The add the vegetables - carrot, beans, green peas and green chillies and stir for about 2 minutes. Drain the water from the rice and moong and add it to the cooker. Stir well. Add the turmeric powder and the salt and after mixing it well add the water. Once it boils check for salt and then close the pressure cooker and put on the weight. Let it cook for 3 whistles on medium heat, then open and serve in a bowl. Just before taking it to the table add a blob of ghee on top of the khichdi and serve with papad and achaar.

Simple Coconut Chutney

The coconut chutney can be made in so many ways. Simple additions or changes can make the chutney taste completely different. This is the simple coconut chutney we usually make to accompany dosa and when paired with ulli chammanthi (recipe given here) with idli makes a yummy breakfast. If you are breaking a fresh coconut use some of this water when grinding this chutney, it just enhances the taste of a simple chutney. I thought of doing this just recently and now always add some coconut water when grinding chutney. This addition does make the coconut chutney a tad sweet so adjust the green chillies accordingly.
Ingredients
Coconut - 1 cup grated
Green chillies - 2
Curry leaves - 2-3
Coconut water - 3 tbsp.
Water as required
Salt to taste
For tempering
Oil - 1 tbsp
Mustard seeds - 1tsp
Curry leaves - 4-5
Grind the grated coconut, curry leaves and 1 green chilli with the coconut water till fine. Taste the chutney and if needed add one more chilli and grind with salt and water as required. Pour it into the serving bowl. In a small pan / kadai add some oil and heat it. When hot add the mustard seeds and once it has spluttered add the curry leaves and immediately take it off the heat and spoon it onto the chutney. It is ready to be served with idli, dosa and even upma!
The coconut water is full of minerals and potassium and its addition makes this chutney healthy as well. Since we do not heat the chutney itself the composition of the coconut water is not altered

Tuesday, August 13, 2013

Coconut and Fried Onion Chutney

A Variations to the coconut chutney
This is just one of the chutneys we make at home to go with either dosa or idli. The bland idli tastes best when paired off with something hot and spicy. We usually make a batch of the ulli chammanthi or onion chutney (recipe given here) and store it in the refrigerator. This chutney here is a variation to the ulli chammanthi and the usually coconut chutney. This is a coconut chutney with a little twist.
Ingredients
Coconut - 1 cup
Onion - 1/4th
Dried red chillies - 2 to 3
Curry leaves - 3-4
Salt to taste
Oil - 1tsp
for seasoning
Mustard seeds - 1/2tsp
Curry leaves - 5-6
Oil - 1 tsp
Chop the onions. Heat the oil in a pan and fry the onions in it till light brown. When done, add the dried red chillies give it a stir and take it off the gas. Grind the grated coconut, the fried onion, dried red chillies curry leaves and salt with little water to a fine paste. Add water to get a thickish consistency. Pour it  out into a bowl, check for salt and add if necessary.
 
Heat a pan for the tadka, add the oil and when hot add the mustard seeds. When it splutters, add the curry leaves and take it off the gas and pour it over the chutney.
 
If Sambhar onions or cheriya ulli is added to this recipe, the chutney's taste is elevated to a completely different lever. I did not have the cheriya ulli so used savaalla ulli or the usual onions in this recipe.


Sweet Seviyan / Vermicelli

Ingredients
Vermicelli - 1 cup
Sugar - 1/2 cup
Water - 1 cup
Whole Milk - 1 cup
Malai - 2  tbsp
Ghee - 3tbsp
Cashew nuts - 12-15
Raisins - 8-10
Saffron syrup - 1 tsp
Saffron - 1 pinch

Take a flat pan and dry roast the vermicelli for about 5 minutes. Then add the ghee and continue roasting till it gets a nice golden color. Take off the stove. Spoon the vermicelli out leaving the ghee in the pan. In this pan fry the raisins and the broken pieces of cashew nut one after the other and scoop them out onto paper towels.
 
Heat 1 cup water in another pan and add the roasted vermicelli to it. Cook the vermicelli till 3/4th done and the water is absorbed. Add the milk and the malai to the vermicelli and continue cooking. Once this mix has thickened check if the vermicelli is cooked completely. Then add the sugar and stir it in till completely mixed. The consistency of the seviyan will be thickish, incase you want to make it a little thin add a tablespoon of milk at a time to loosen it. Then add the fried cashew nuts and raisins. Take it off the stove and add the saffron syrup and mix well.
Sprinkle the saffron and badam slivers on top and the seviyan is ready to serve.
 
P.S: If you want a very lightly sweet seviyan / vermicelli, add the sugar little by little till you get the required taste.
Contributed this recipe on tarla dalal website: http://www.tarladalal.com/Sweet-Seviyan-38690r

Monday, August 12, 2013

Erachi Ularthiyathu / Mutton Fry

At my parents home, we had fish more often than chicken and hardly ever had mutton. One reason for not having mutton could be that there was no good mutton shop nearby. At my husband's home they had aatterachi / erachi / mutton more often than chicken and that's when I actually started appreciating its taste. At my in-laws place it was my father in law who made the mutton. And it was awesome. My husband would go buy the erachi fresh in the morning and my father-in-law would cook it with 2 assistants - my sister-in-law and I. My mother-in-law was not involved in the cooking because by then she had given up eating non-vegetarian food. Me being a novice in cooking, my father-in-law would actually cut one piece to show how he wanted the onions, ginger, garlic and tomatoes cut. He made a erachi ularthiyathu / erachi olarthiyathu with the good pieces and erachi curry with a few meat and bone pieces. At that time I never considered learning how to make it but thankfully my husband knew. And now, I think we are able to recreate that same taste.
Ingredients
(these ingredients are enough for 2 people, just double or triple according to required quantity)
Mutton (goat meat) / Ghosht / Aatterachi - 400gms
Onion / Pyaaz / Savaalla ulli - 1 large
Tomato / Tamatar / Thakaalli - 1 medium
Ginger / Adrak / Inji - 2 inch piece
Garlic / Lehsun / Velluthulli - 10 pods
Shallots / Sambhar onions / cheriya ulli - 8-10
Curry leaves / Kadipata / Kariveppila - 5-7 sprigs
Masala powder:
Cloves / Lavang / Graambu - 4
Cinnamon / Dalchini / Karvapatta - 1 inch piece
Coriander / Dhaniya / Malee pwd - 2 tbsp. heaped
Aniseed / Saunf / Perinjeerakam - 1 tsp heaped
Cardamom / Elaichi / Elakya - 1
Marinade:
Turmeric pwd / Haldi / Manjallpodi - 1tsp
Red chilli pwd / Lal mirchi / Mollagupodi - 1tsp
Pepper pwd / Kali miri / Kurumollagu - 0.5tsp
Salt to taste
Clean and cut the mutton in small pieces. Mix the turmeric powder, red chilli powder, pepper powder and salt and apply well onto the mutton. Keep for an hour, then pressure cook the mutton in a separate vessel without any water for 2 to 3 whistles, till just cooked. This is a dry dish and hence do not add water to the mutton, it will release water. The number of whistles depends on the tenderness of the mutton - we get quite tender meat here and normally 2 whistles are more than enough. Also this recipe calls for stir frying the mutton again with the masalas so if your mutton is overcooked, the end result will be mutton mash and not pieces.

Separately heat a flat pan to roast the whole garam masalas. Dry roast the whole masalas one by one and grind into a fine powder and keep aside.
 
Heat oil in a kadhai and add the chopped onions, ginger and garlic and fry on medium heat. When the onions are fried to a light brown color add the ground masala powder and fry for a couple of minutes. Then add the stock of the mutton and chopped tomatoes and mix well stirring all the time on high heat. Lower the heat and add the mutton pieces, little red chilli powder and pepper powder and sauté to combine all together. Add 2 sprigs of curry leaves and keep stir frying the mutton on low heat for about 10 to 15 minutes. 
 
Separately heat the coconut oil in a small kadai and when hot add the chopped shallots / cheriya ulli and fry till they are light brown in color. Then add the slit green chillies and the remaining curry leaves, stir it and add this over the mutton. Keep on low heat and mix the mutton and the tadka / varathu iddal well. The mutton should be fried well by this time; take this off the gas and keep covered.
 
You can add thengya kothu / coconut slice pieces to the frying mutton closer to the end of frying and use only cheriya ulli for a very very coconutty Kerala taste. We preferred not to add it since we were doing a tadka / varutha iddal in coconut oil and wanted the masalas to stand out. When my father-in-law cooked this as a no coconut dish and the curry was the one with coconut paste and we were trying to be as close to that recipe as possible. I remember him saying once that adding finely chopped fried potatoes when frying the mutton just added to the awesome taste of this dish. Am going to try it sometime.
Our lunch on days that erachi olarthiyathu is made, usually comprises rice, sambhar, and this mutton fry. This is a hit menu at our home, hope it becomes a hit with your family too!  
 
This exact same recipe can be used for beef as well, for an amazing dish.
 
- To my father-in-law who is no more.

Tomato / Thakkali Pachadi

This Pachadi recipe is a curry from Kerala, essentially a curry with a gravy base of ground coconut, curd/yogurt and mustard seeds. To this paste, one can add either Tomatoes / Thakaalli or Ladies finger / Vendekkya to make Pachadi. When adding Ladies finger make sure it is fried so that it is not gooey when added to the curry. In Kerala, most curries have a gravy base of ground coconut and cumin seeds / jeera. This may be the only curry from Kerala in which mustard seeds are ground. So if you love the taste of mustard paste, I would suggest you try this Tomato / Thakalli Pachadi.
My mother mostly made Pachadi with tomatoes and that is the one I like. After marriage, I did not make this kootaan (curry) at our home for long because my husband is allergic to curd/yogurt. Hence curries or dishes made with curd / yogurt are usually not prepared at our home more because it is tedious to cook different curries when there are only the two of us at home. Tomato Pachadi was included in our menu at home after my mother made this kootaan using just a couple of tablespoons of absolutely fresh curds, going by the premise that if my husband ate aviyal that has a little curd then he could take this as well. On trying this kootaan, he did like it, so we had one more kootaan added to the list of curries made at home. So a kootaan that is usually made with equal amount of coconut and yogurt is made at our home with just a couple of tablespoons of yogurt.
 
Ingredients
Tomato / Thakaalli - 2 medium
Coconut / Thenga grated - 1.5 cup
Curd / Yogurt / Thayir - 2tbsp
Dried Red chilli /  - 4
Green chilli - 2
Turmeric pwd - 1tsp
Mustard seeds - 1.5tsp for grinding
Curry leaves - 3 sprigs
Oil - 2 tsp
Mustard seeds - 1tsp
Salt to taste
Chop tomatoes into medium sized pieces. Heat a saucepan with a cup water, add chopped tomatoes, salt and turmeric powder and cook on medium heat. Separately grind coconut, mustard seeds, green chillies and 2 of the dried red chillies. Add minimal water when grinding so that the mustard is ground well. Then add the yogurt also and give it a quick whisk and this fine paste is ready to be added to the curry. Once the tomatoes are cooked add the ground paste and mix well. Add a little water as required to get a thick curry consistency. Let it boil once, lower the gas to check for salt and then take it off the heat and keep it covered. Heat a small pan for the tadka / vagaar / varathu iddal and add the oil. When the oil is hot put in the mustard seeds, let it splutter then tear 2 dried red chillies into pieces and add it in along with the curry leaves. Stir it and take off the heat and pour the mix into the curry and cover immediately. Open the lid when ready to serve.
 
To get the authentic taste of this curry more yogurt is to be added when cooking. Like I said we restricted the amount of yogurt to suit my husband's palate. The tomato pachadi is best had with rice and paired off with thoren and pappadam.

Sunday, August 11, 2013

Semiya Upma / Vermicelli Upma

 
At home, we had a different breakfast every morning, it could be any of these - idli, dosa, appam, puttu, rawa upama, semiya upama, daliya upama, chapati bhaji, dal dosa, bread and eggs, veg sandwiches. Mom had to think of different dishes to make everyday else my sister and I would complain about eating the same stuff over and over. Add to that I would refuse to eat some of these - like idli and rawa upma / upama. My mom would make every effort to have another option for me on those days. But on some days she insisted I had what was made, so upma was eaten with my favorite elaichi kela / small banana or a little sugar sprinkled over it. Today, when I am the one cooking I realize the trouble my mom took to make sure each of ate well.

This one of the breakfasts I like to make - semiya upma or vermicelli upma. The recipe is very similar to rawa upma.
Ingredients
Vermicelli - 1 cup or 1 katori
Onion - 1 medium
Green chillies - 2
Curry leaves - 8 to 10
Mustard seeds - 1/2tsp.
Water - 2 cups or 2 katori
Coconut - 2 tbsp.
Oil - 1tbsp
Salt to taste
Heat a pan and dry roast the vermicelli on low heat till light brown. Take it off the heat and keep aside. Chop the onion and green chillies finely.
Heat the oil in a kadai add mustard seeds and once it has spluttered, add the green chillies and curry leaves, a second later add the chopped onions and stir fry. Saute the onions till light brown. Add the water and salt, mix well and let the water boil. Lower the heat and add the roasted semiya to the water. Cover the kadai with a deep plate and add some water in the plate. This will help in cooking the vermicelli. After about 10 minutes take the plate off and check if the vermicelli is cooked. If necessary add a little more water and stir it well. Add grated coconut, stir it well and take it off the heat.  It is ready to serve.
Pair the semiya upma with a chaaya and enjoy.

Wednesday, August 7, 2013

Baingan Bharta

 
I loved the colors I got in these pictures and wanted to put them up first. Will add the recipe in shortly :)


Once you have roasted the eggplant / aubergine, use the wrong end of the knife to remove the charred skin. Use a fork to roughly mash the roasted eggplant / aubergine, let there be chunks and pieces. At this stage, the aubergine can be used as a topping on a pizza or on an open sandwich. It can also be made into a salad with bell peppers, onions and mozzarella cheese. And not to forget Baba ganoush made with yogurt and tahini!