Thursday, October 31, 2013

Maida Chakli

This recipe for chakli made from maida is from my mother in law. Her chakli always turned out nice and crispy and my husband and I always enjoyed munching it. I was surprised when she gave me the recipe since it was super easy without any of the hassles of grinding it in the mill, etc. You can pick the flours available in any store and start with the making of it. 

At my in laws place, my mother in law made this chakli and shakkarpare and then my father in law made the rawa ladoos. The making of the rawa ladoo was like an event. He wanted the kitchen to himself and wanted my mother in law to clear out after keeping the containers of all the containers out. In fact, many a times he made the rawa ladoo when my mother in law went to the temple leaving him to do as he wanted. And then started the measurement, the roasting, the sauteing and finally mixing and making the laddoo itself. My husband really loves the rawa ladoo but I never learned to make it from my father in law and till date, we buy rawa laddoo at home. May be one day, I will try a recipe and surprise my husband, (hopefully) pleasantly. 

Back to my chakli.
Ingredients
Maida - 1 cup
Red chilli pwd - 1 tsp
White Sesame seeds - 1.5 tbsp
Cumin seeds - 1 tsp
Salt as per taste
Water for making dough
Oil for frying
Take a dry muslin cloth, spread it out open and put the maida in the center. Bring together all the ends and tie it up into a potli. Leave a little space within so the flour is not bound too tight. Put this potli in a steamer stand making sure the potli does not get wet. Steam for 15 minutes on medium heat. Take the maida potli out on to a plate with the help of tongs. You will see that the maida has clumped up, without opening the potli crush these clumps with the back of the mortar or sil (from the sil - batta) when hot. Then sieve this into a bowl. Add salt, red chilli powder, sesame seeds and cumin seeds and mix with your fingers. Knead this flour into dough by adding water little by little. Keep the ball of dough covered. 

Fill the chakli mould with a ball dough and press into either coils or straight pieces. Heat oil on high and when hot reduce the heat and slowly slide the chakli pieces into the oil. The pieces should be submerged in oil and should have space to be turned over. Fry till light golden. Scoop the chaklis onto paper towels to absorb the excess oil and when cool store in an airtight container. 

A small variation in the flour mix also makes a great chakli.
Variation
Maida - 3/4 cup
Besan - 1/8 cup
Wheat flour - 1/8 cup
Mix all the flours and then tie into the potli and steam. Follow the recipe as given above. 
Chakli made by: (l to r) my mom, me and my mother-in-law
 
This recipe for Chirote / Khaja is going to these events :
-  "Diwali Special" hosted by gayathriscookspot.
&
-  "Diwali Bash 2013" hosted by cooksjoy.
-  "Diwali Delicacies Event" jointly hosted by priyaeasyntastyrecipes & spicytreats
"Spotlight: Festival Treats" hosted by cuisinedelights


Wednesday, October 30, 2013

Shankarpalli / Shakkarpare

Every time I make Shankarpalli, I am reminded of my friend L's mother. Auntie shared her recipe with me and encouraged me to try it her way. I remember, I had made some and took it to her for her verdict. Auntie is a very good cook and took pride and pleasure in preparing different and new dishes. She could turn the simplest of meals to the tastiest, with her koshimbirs, thechas and chutneys. Auntie would cook up quite a faraal spread for Diwali - chivda, ladoo, coconut barfi, kaju katli, chakli, shankarpalli and she would ply L and me with all these goodies and we would happily stuff ourselves. This year, they will be in Mumbai during Diwali but since I am not going there I will miss them. This is Shankarpalli goes to Auntie. 
Ingredients
Milk - 1/2 cup
Sugar - 1/2 cup
Ghee - 1/2 cup
Maida / All purpose flour - as required
Oil for frying
In a pan heat milk and add the sugar and mix in. Add the ghee and stir till it is melted and mixed. Take off the heat and keep to cool. The milk will curdle and it is normal. When it has cooled down, add the maida little by little and make a soft dough. Make balls of dough and keep covered in a container. Roll out each ball of dough into square / rectangle shaped chapati. It should be slightly thicker than normal chapati (not phulka). Place this on the back of a plate and cut into square / diamond shaped pieces. Once two such chapatis are made and cut into squares, start the frying. And then roll and cut parallely with the frying.
 
Heat oil in a kadai on medium high. When hot, reduce the heat and slowly slide the pieces into the oil for frying. Fry till the pieces are light golden then scoop it onto paper towels to drain off the excess oil. Store in an air tight container.  
Today, when the milk and ghee mix was cooling, I started prepping my lunch, a potato and beet salad. That's when the idea of adding grated beets came to me, so I took one portion of the dough and added the beet and kneaded again. After that continue with the steps of rolling and cutting and frying. The beets give the fried shankarpalli a red hue but it was negligible if browned when frying.
Beet Shankarpalli

 
This recipe for Shankarpalli / Shakkarpare is going to these events :
-  "Diwali Special" hosted by gayathriscookspot.
&
-  "Diwali Bash 2013" hosted by cooksjoy.
-  "Diwali Delicacies Event" jointly hosted by priyaeasyntastyrecipes & spicytreats
"Spotlight: Festival Treats" hosted by cuisinedelights


Tuesday, October 29, 2013

Chirote / Khaja, a layered sweet delight

Chirote is a sweet snack made in Maharashtra for Diwali that looks like a not completely pressed dry flower. This is sweet is layered and looks like a rosette with the layers opening after it is fried. The chirote also known as khaja, chiroti or pakwan, features in the cuisine of different states like Oriya, Karnataka and a few others. I read about chirote a few years ago and although it seemed like a great tasting sweet, I had my doubts about being able to get it right. Last evening, I did give it a try and it did not seem difficult at all, just that it requires a little patience.
 
Just like the lights and lamps, snacks, both sweet and savory are intrinsic to the celebration of Diwali. As children, during the run up to Diwali, all the apartments in the whole building buzzed like a beehive. We saw a lot of cleaning at all homes, new torans / bandhan dwars were put up, and a few days prior to Diwali rangolis were drawn, diyas were lit at entrances, etc. Along with all this, the women managed to make yummy delights as well. Typically, the afternoons, when most of the ladies managed to take some time out from chores, were earmarked for making goodies. Yummy aromas from all around wafted in from the windows at that time and sometimes we could guess which aunty was making what goodie. The aunties took pride in cooking up a range of sweet and savory snacks and each aunty was known for at least one delicacy. Like Aunty S was known to make the tedious and time consuming wheat halwa at home. Aunty A made yummy besan ladoo that her daughter also learnt to make later. Aunty L made ribbon pakodas that were soft and crisp at the same time. The best Maharashtrian chakli was made by Aunty K along with a melt in the mouth burfi. I remember having some spicy chivda as well but cannot remember who made it. On the day of Diwali, we children would take plateful of goodies to the other apartments and would return with some of their goodies. Tea time meant having a choice of the yummiest of snack spread at home.

For many years I could not be bothered with making any of these snacks but then I guess with age comes nostalgia and I started preparing a few delicacies at home. And now, I like to try at least one different snack each time and the Chirote is one such attempt . I followed Madhura's recipe for Chirote because the addition of rawa / semolina gives it a little crunch and this worked well for me.
Ingredients
Oil for deep frying
for the chirote
Maida / All purpose flour - 1 cup
Rawa / Semolina - 1/4 cup
Water - 1/4 cup
Oil - 2 tbsp
for applying between layers
Ghee / Butter - 2 tbsp
Rice flour - 2 tbsp
for the syrup
Sugar - 3/4 cup
Water - 1/2 cup
Saffron - few strands
Lightly powder the rawa / semolina in a dry grinder. Mix together the maida / flour and the rawa in a bowl. Heat the oil and add it spoon by spoon into the flour, mixing it with a spoon all the while. Then wait for a few minutes for the oil to cool a little. Using your fingers rub the oil into the flour mixture till it resembles bread crumbs. Then add the water little by little and make a soft smooth dough. Divide the dough into six equal balls and keep it in a bowl and cover with a lid or cling film.

The ghee / butter should be in room temperature and not hard when using. In a bowl add the ghee and the rice floor and mix well. Keep this aside.

Take a rolling pin and using a clean surface, roll out each ball into a thin round chapati and keep separately. Place one thin chapati on a flat surface. Spoon a little of the ghee and rice flour mix and dot it all over the chapati. Spread it so it covers the entire chapati. Cover this chapati with another one and spread the ghee and rice flour mix like before. Place the third chapati on top on it and apply the ghee and rice flour mix like before. Now, starting from one edge, raise this edge a little and start rolling it inward into a tight log like in a pinwheel roll. Take a sharp knife and cut the two ends of the log. Hold the log with one hand and cut the log into half inch to 1 inch pieces, keeping the knife in a slight slant direction so the layers are visible. With the rolling pin flatten these pieces by rolling it out lightly. When rolled the pieces will be an oblong rectangle.

In a sauce pan, add the sugar and water and heat till a simple syrup is made. Add the saffron strands or saffron syrup and take off the heat.
Heat the oil in a kadai or pan and slowly fry the rolled out pieces one by one, gently pressing down the pieces. As it fries the layers will separate, scoop out when done and drain off on paper towels. When the oil is drained completely add the pieces one by one into the saffron infused sugar syrup and dip all sides to coat completely. Then lift off with tongs and stand it in a bowl to drain excess syrup. Continue frying all the pieces and dipping in the sugar syrup. Once the syrup is drained serve on a platter.

Variation
Caster sugar - 1 bowl
Once the pieces are fried and drained off on the paper towels, drop one piece at a time into the bowl and coat all sides with the sugar. Spread it on a platter and its ready to serve.
Sugar syrup coated chirote

This recipe for Chirote / Khaja is going to these events :
-  "Diwali Special" hosted by gayathriscookspot.
&
-  "Diwali Bash 2013" hosted by cooksjoy.
-  "Diwali Delicacies Event" jointly hosted by priyaeasyntastyrecipes & spicytreats
"Spotlight: Festival Treats" hosted by cuisinedelights

Monday, October 28, 2013

Veth Chaman - Paneer Kashmiri style

Kashmiri cuisine continues to be a little of a mystery and not many restaurants serve authentic Kashmiri dishes. The Rogan Josh is one dish that is seen on the menu of many restaurants but whether it is authentic is questionable. Chaman means paneer in Kashmiri and makes use of spices like sonth or dry ginger powder and saunf or aniseed powder which is unique to the Kashmiri cuisine. Veth Chaman does not have onion or garlic in it and hence is good to add to the menu for a puja or religious menu. The dish is rich and will go well on a party menu as well, pair it off with either tandoori roti or vegetable pulao to complete the picture. In fact, this is a good combination to put on your Diwali dinner menu.

I came across this dish when I was browsing through some old magazines and checked online for the recipe and followed the recipe given by Chef Aditya Bal. I did make a few minor changes like adding a little more milk and curd than suggested in the original recipe because this dish does dry up quickly. I had to add a little milk just before serving to get a little gravy.
Ingredients
Paneer - 500 gms
Water - 1 cup
Asafoetida pwd - 1/4 tsp
Oil - 1 tbsp
for gravy
Cumin seeds - 1/2 tbsp
Cinnamon - 1
Cloves - 5 to 6
Turmeric pwd - 1/2 tsp
Red chilli pwd - 1/2 tsp
Kashmiri chilli pwd - 1.5 tbsp (for red color)
Dry ginger pwd - 2 tsp
Curd - 2 tbsp
Milk - 1/2 cup
Brown Cardamom - 3
Green Cardamom - 3
Saunf pwd - 3 tsp
Garam Masala - 1.5 tsp
Salt to taste
Oil - 2 tbsp
for garam masala
Cloves - 4 to 5
Cumin seeds - 1/2 tbsp
Black peppercorns - 1/2 tbsp
Coriander seeds - 1/2 tbsp
Green Cardamom - 3
Brown Cardamom - 1
Cinnamon - 1 piece
Dry Ginger pwd - 1/4 tbsp
Boil the water and add the asafoetida to it and keep the heat on low. Separately heat pan or griddle and heat the 1tbsp oil. Cut the paneer in cubes and add it to the oil when it is hot. Lower the heat and let it sear a little on all sides by tossing it a few times. Scoop the paneer pieces out and dab on a paper towel to take as much oil out as possible. Add the pieces to the hot water and keep aside.
Take a dry pan and roast the spices listed under garam masala on low heat. Roast each of the spices separately and lastly add the dry ginger powder and immediately take off the gas. Put it all into a dry grinder and powder till fine.
Heat a pan and add the 2tbsp oil. When hot add the cumin seeds, cinnamon, cloves and stir then add the dry ginger powder, turmeric powder and red chilli powder and immediately add about 2 to 3 tbsp of the asafoetida water so the spices do not burn. Beat the curd and add into the pan and sauté, the oil will start separating at that stage add the milk, cardamoms and saunf powder. Stir and blend all well. Then add the paneer pieces and 1.5 tsp of the prepared garam masala powder. Add the asafoetida water only to balance the gravy, do not over add. Cover it and simmer for a couple of minutes before taking it off the heat.

Notes: I used about 3/4th to 1 cup milk and about 3 tbsp curd. The curd should be slightly sour for a rounded taste to the dish.
Veth Chaman served with Veg Pulao

This recipe for Veth Chaman is going to these events :
-  "Diwali Special" hosted by gayathriscookspot.
&
-  "Diwali Bash 2013" hosted by cooksjoy.
-  "Diwali Delicacies Event" jointly hosted by priyaeasyntastyrecipes & spicytreats

Sunday, October 27, 2013

Bund Gobi / Cabbage Sabzi

We normally make this cabbage / bund gobi sabzi on weekdays for a packed lunch to take to work. Since this sabzi is made with an onion and tomato masala it goes well with chapati. and normally features on our menu once a week at home. Cabbage cooks quickly and hence it doesn't take much time to cook this sabzi. Cabbage, considered a humble vegetable, is rich in Vitamin C, Sulphur, Beta-carotene, Calcium, Magnesium and Potassium. It is also a good source of roughage which is essential for the good health of our digestive system.
Traditionally, cabbage is considered a cheap vegetable but is definitely not so, currently. With everyone talking about the price rise of onions the high prices of vegetables are being ignored. I am reminded of a sarcastic comment that in the olden days you took a purse of money to the market and bought a bagful of vegetables / fruits, today the reverse is true - a bagful of money gets you a purse of vegetables / fruits. Is this a normal cyclical occurrence that we are being led to believe or is it an artificially created shortage and price hike? Political parties do not seem interested in correcting the wrongs but instead want to utilize this situation to further their popularity. Is it difficult to establish - a farmer to market pipeline, good warehousing or stocking facilities across the country, good logistics to take products across the country or a clean disbursal system? Maybe it is, after all with all the intelligence that Indians are credited to have, we have still not managed to do any of this. Most of our intelligence is used in making wily moves so who has the time do anything constructive, right?
 
And now that I am done venting my frustration and ire, let's get back to making my humble Bund Gobi / Cabbage Sabzi.
Ingredients
Cabbage - 3 cups, tightly packed
Onion - 1
Tomato - 1
Turmeric pwd - 1/2 tsp
Red chilli pwd - 1 tsp
Coriander leaves - 1 tsp
Oil - 1 tbsp
Salt as per taste
Chop the cabbage, wash it and then drain and keep aside. Chop the onions and tomatoes and keep aside.
Heat a kadai or pan and add the oil. When the oil is hot, add the chopped onions and sauté till light golden then add the chopped tomato and fry. Once the tomatoes have softened add the turmeric and red chilli powder and sauté. And add the chopped cabbage and salt and mix well till the cabbage is coated with the onion tomato mix. Do not over cook the cabbage it tastes horrible. Cover and cook till the cabbage is cooked. Add the coriander leaves and stir it in. Take off the heat.
Take it into a bowl and serve.
 
Variation to the above sabzi
Add chopped potatoes to this sabzi for a change. Add 1 cup chopped potatoes just after adding the turmeric and red chilli powders and cover and cook till half done. Then add the chopped cabbage and follow the instructions like above.
 
What I did was, added two small eggplants / brinjals chopped to the sabzi since I did not want to go bad in the refrigerator.  

Saturday, October 26, 2013

Almond Haven aka Badam Burfi

Diwali is round the corner and preparations are on with cleaning the house, putting up the lights, and preparing sweets and savories that are customary for this festival. While growing up, we looked forward to the two-week vacation more than anything else. New clothes, crackers, and lots of snacks were the bonus. That Diwali was around the corner was obvious from the cartloads of diyas, candles, tea-lights, rangoli colors, and rangoli stencils that flooded the market. The shops were all lit up and on display were hampers with sweets and dry fruits and other gift items. On sale was the ubiquitous "star" and "disco" lights also.
In Mumbai, these snacks and sweets are called faraal. Preparations and plans for making faraal began weeks back. The aunties in the locality would discuss what faraal to make and what things were to be bought. Those were the days when supermarkets were not there and readymade flour was not available. Therefore, just before Diwali, the flour mill saw an influx of steel dabbas with different dals and cereals that were needed to make these goodies. The afternoons were reserved for grinding these items at the flour mills and housewives would then get down to making two or three items per day. Children on vacation would hover around to sample it and the elders would give their ‘initial reactions’ on how it turned out.
Cut to the present, with only the two of us at home, and in a different city than Mumbai, Diwali is as much or as little as we make it to be. Till date I enjoy the excitement that surrounds this festival - whether it is buying those cute diyas or drawing out a few awkward rangolis or making faraal at home. The cleaning is on, one set of lights are out, I want to buy some new diyas and along with that today I started on making the faraal. I decided to start on a sweet note with an Almond / Badam Burfi. The only thing about making these goodies is that it is requires strong will and steely resolve on my part to make it last till Diwali and in the case of hubby dear the only way is to hide it from him.
Almond / Badam Burfi
Ingredients
Almonds - 1 cup
Sugar - 1/2 cup
Water - 1/3 cup
Almond essence - 3 to 4 drops (optional)
Ghee - 2 tbsp
Food Color (optional)
for garnishing
saffron strands - small pinch
crushed almonds - 1 tsp
Grease the pan you will set the burfi in and keep aside. Heat water in a saucepan and when it boils add the almonds / badam and take off the heat. Keep aside for an hour. After an hour wash the almonds and skin them, it will be easy to do this now. Grind the almonds to a fine paste with a little water.
In a saucepan, add the sugar to the remaining water and heat till it is of one-string consistency. Heat a kadhai or any heavy bottomed vessel and add the sugar syrup and almond paste and stir and mix it well. Keep on low heat and stir often if not continuously. Add the almond essence and keep stirring till the whole mix comes together and starts leaving the sides of the pan. Spoon a little of the ghee around the almond mix and bring it together. When the mix comes together completely into a ball smear the rest of the ghee on it and put it into the greased pan. Use a square or rectangle pan for ease of cutting the burfi into shape.

Sprinkle the crushed saffron and the crushed almonds on the burfi and keep it in the refrigerator to set.
This recipe for Almond Haven aka Badam Burfi is going to these events :
-  "Diwali Special" hosted by gayathriscookspot.
&
-  "Diwali Bash 2013" hosted by cooksjoy.
-  "Diwali Delicacies Event" jointly hosted by priyaeasyntastyrecipes & spicytreats
"Spotlight: Festival Treats" hosted by cuisinedelights

Fried Eggplant / Baingan

Living on a tight budget means looking for deals and coupons and buying things as cheap as possible. When we moved to the US, we learnt to do exactly that - live on a budget. The weekend newspaper carried coupons for grocery, food, daily needs, etc. and we cut the coupons we needed. We had a store nearby that was almost like a farmers market with fresh produce coming from the farms around. We always visited the store on Wednesdays because it had a sale on that day when they dropped the price of produce and seafood. And sometimes the prices dropped to a few cents and we were happy to buy it and put it in the freezer. In seafood we stuck to either tilapia or prawns but many times it wasn't on discount and we wouldn't buy it. During those weeks, I racked my brain to make a fry of some sort and this eggplant fry was the outcome of those experiments.

Since we missed fried fish so much, I tried to make the eggplant as similar to the fried fish and used the spices to marinate the eggplant slices before frying it. Actually, frying is a misnomer because it requires only a couple of spoons of oil and it is grilled on a griddle. Use a ridged griddle like I did and you get nice lines on the eggplant slices. For this recipe use the big round eggplant that is used for baingan bharta and eggplant parmesan. This fried eggplant can be made in two different ways - one with wheat flour and the other gluten free. Both the versions taste good but I prefer the wheat flour coated one for its powdery crispness.
Version 1 - Fried eggplant with wheat flour
Ingredients
Eggplant / Baingan
Wheat flour - 1/4 cup
Turmeric pwd - 1 tsp
Red Chilli pwd - 2 tsp
Coriander pwd - 1/2 tsp
Salt as per taste
Oil - 2 tbsp
for garnishing
onion rings - 5 to 6
julienned carrots - 2 tbsp
Slice the eggplant into 1/2 to 3/4 inch thick slices and keep the slices soaked in salted water till the other ingredients are mixed and ready. In a bowl mix the wheat flour, turmeric powder, red chilli powder, coriander powder and salt and then spread it on a platter. Drain the eggplant slices and prick all over with a knife or fork. Dip it into the powder mix and coat both the sides. Heat the griddle and add the oil, use a spatula or brush to spread the oil all over. Once the griddle is heated lower the heat and put the eggplant in a single layer. Turn the slices over and cook for 5 minutes before flipping it over again. Try and place the slices just like before on the same ridges. Slowly press down the slices with a spatula so it cooks well and do the same for the other side.
Take it off the heat and serve with sliced onions and julienned carrots.

Version 2 - Gluten free Fried eggplant
Ingredients
Eggplant / Baingan
Turmeric pwd - 1 tsp
Red Chilli pwd - 3 tsp
Coriander pwd - 1 tsp
Oil 1 tsp
Lemon jce - a few drops
Salt as per taste
Oil - 2 tbsp
for garnishing
onion rings - 5 to 6
julienned carrots - 2 tbsp
Slice the eggplant into 1/2 to 3/4 inch thick slices and keep the slices soaked in salted water till the other ingredients are mixed and ready. In a bowl mix the turmeric powder, red chilli powder, coriander powder, salt, lemon juice and oil. Drain the eggplant slices and prick all over with a knife or fork. Apply the masala mix on both sides of the slices, rubbing it in. Keep the slices aside for 15 minutes.
Continue with cooking the eggplant slices like in the previous version.

Thursday, October 24, 2013

Chicken Gassi, a Manglorean style Chicken Curry

In Mumbai, some of the seafood restaurants serve a few Mangalorean dishes typically neer dosa, gassi and sukke dishes. One of the seafood restaurants I like in Mumbai is Apoorva and they serve an awesome prawn and chicken gassi. Chicken gassi is a typical South Indian recipe in which coconut is used lavishly. Both grated coconut and coconut milk is used along with coconut oil to make this a creamy and very coconutty curry. Chicken gassi is best had with rice especially the brown rice that is predominantly used in South India. And yes, remember to cook some vegetable with coconut to go with the curry and rice.
When we were in the US, a colleague of mine told me about a restaurant that served Mangalorean cuisine in Jersey City, NJ. We visited it once and fell in love with the food they served, especially the amazing mutton sukke. But the next time we visited it had shut down, I guess they did not have many takers there.
Ingredients
Chicken - 800 gms
Onions - 1.5, medium
Tomatoes - 2, medium
Coconut milk - 1/2 cup
Tamarind - a small ball
Turmeric pwd - 1tsp
Red chilli pwd - 3 tbsp (Kashmiri chilli)
Curry leaves - a few sprigs
Oil - 1 tbsp
Coconut oil - 1 tbsp
Salt as per taste
for a paste
Coconut - 1/2 cup
Onion - 1.5, medium sized
Garlic - 8 to 10
Cloves - 4
Cinnamon - 2 small pieces
Coriander seeds - 4 tsp
Cumin seeds - 2 tsp
Fennel seeds - 1/2 tsp
Fenugreek seeds - a generous pinch
Mustard seeds - 1 tsp
Peppercorns - 10
Dry red chillies - 5
for tempering
Curry leaves - 10 - 15
Coconut oil - 1 tbsp
Clean and trim the chicken pieces off all the fat and then wash it well. Put the pieces into a bowl and add a little salt and turmeric powder and mix and keep in the refrigerator an hour at least.
For the masala, heat a frying pan and dry roast the coriander seeds, cumin seeds, mustard seeds, fenugreek seeds, peppercorns, fennel seeds, cloves, cinnamon and dry red chillies separately. Then dry roast the grated coconut till medium brown and keep aside. Add some oil into the same pan and sauté the onion and garlic till the onions turns light golden.
Add the roasted whole masalas, coconut and fried onions and garlic into a blender jar with a little water and grind to a fine paste. Keep aside.

Chop the onions and tomatoes and keep aside. Soak the tamarind ball in water and extract pulp and keep aside.
Heat a pressure cooker and add both the oils and when hot add the curry leaves and onions. Sauté till the onions are translucent then add the chicken, red chilli powder and the ground masala and sauté for a few minutes till everything is mixed well. Then add the chopped tomatoes and 1 cup water and cover and cook till almost done. I cooked it in pressure for 2 whistles. Open and add the tamarind pulp and mix well and give it one boil. Adjust the seasoning and add the coconut milk and mix in well. The curry should have a slightly thick gravy, add water if required since it continues to thicken even when taken off the gas.
For the tempering, heat the pan or small kadai and add the coconut oil, when its hot add the curry leaves and take off the heat. Stir till all leaves are coated well and pour it onto the prepared curry and cover and keep till ready to serve.
I sautéed some sliced small / sambhar onions in the oil before adding the curry leaves since I thought it would add to the taste. Its completely optional to do so.

Wednesday, October 23, 2013

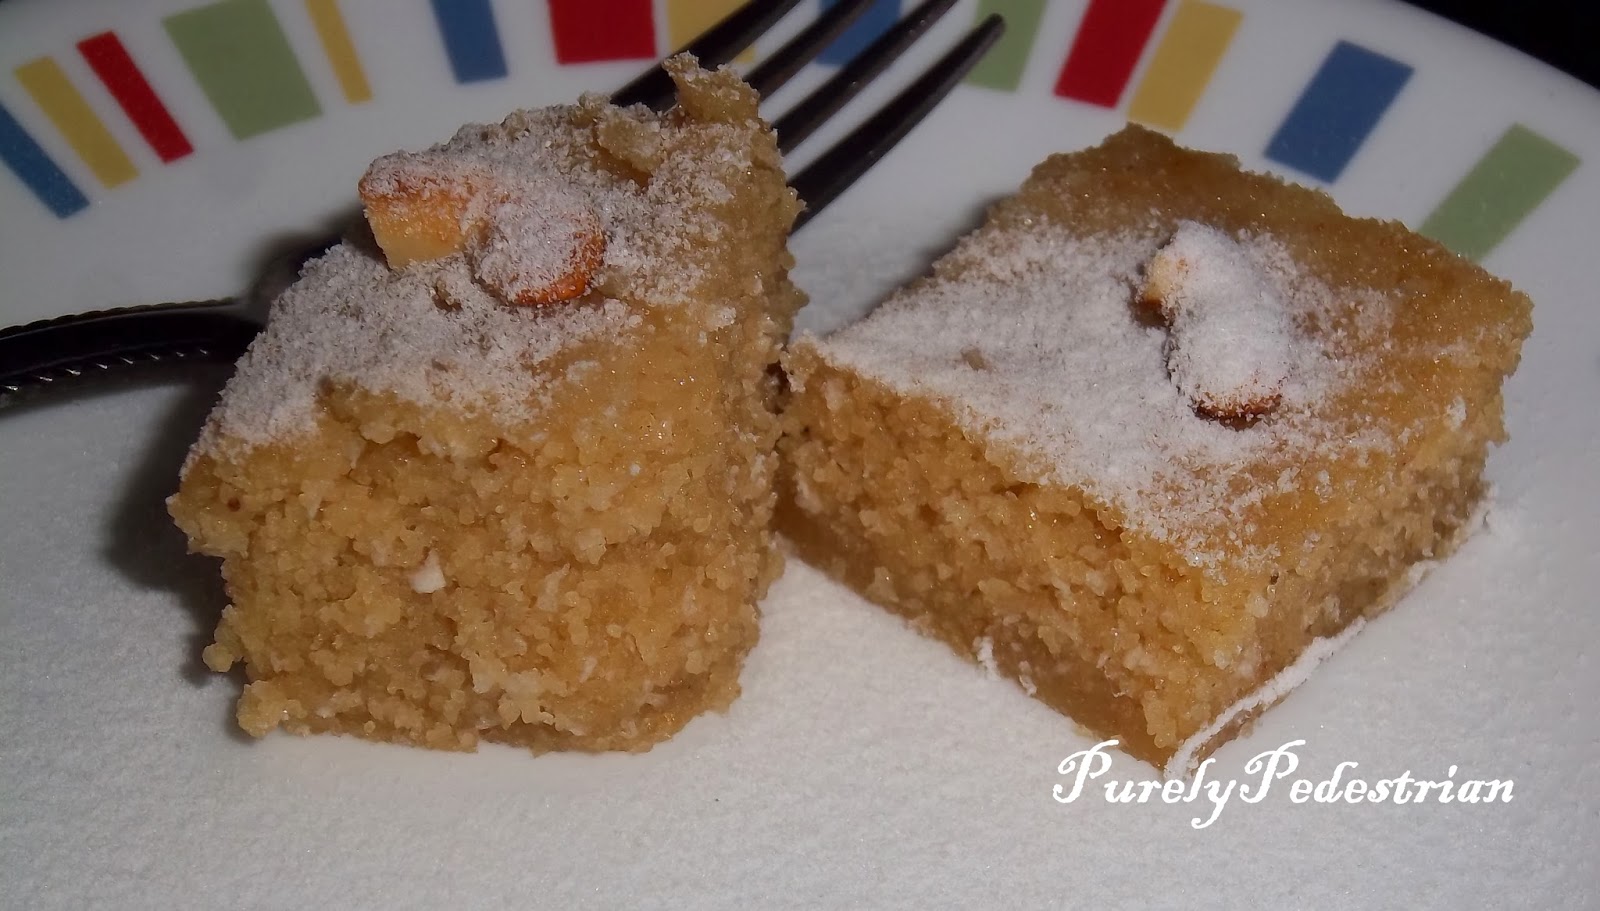
Simple, No Bake, Semolina / Rawa Cake

This simple Semolina or Rawa Cake is in celebration of my completion of 100 posts on this blog. It did take long to reach here and it can all be attributed to my initial slow action :) True to tradition, my 101st post is a celebrative recipe - a very simple, no egg, no dairy and a no bake cake. This cake has a lot of nostalgic memories attached to it for me. There was a time when not every house had an oven and housewives had to think of ways to make a cake. Many found ways to make a cake in a cooker and my mother was one of them. I was a nut for sweet dishes then and mom had to rack her brain to make something that I would eat. This semolina / rawa cake was one of those evening snacks she made on our return from school.  And I loved it and would ask her to make it often. Then I guess we got over our fancy for this cake and mom stopped making it and forgot the recipe as well. Many years later, I saw a savory version of this recipe and spoke with mom about it and she gave me a broad idea on the ingredients she had used. A couple of trials later I got the recipe right for this Semolina / Rawa Cake.
This is a simple steamed cake with semolina, coconut and jaggery with cardamom to flavor it.
Ingredients
Semolina / Rawa - 1 cup
Jaggery - 3/4 cup
Coconut - 1/4 cup
Water - 3/4 to 1 cup
Cardamom pwd - a couple of pinches
Fruit salt (Eno) - 1/4 tsp
Ghee - 1 tsp to grease the vessel
for garnishing
Caster Sugar
Cashew nuts
Raisins
Ghee - 1 tsp
Shred the jaggery and keep aside. Heat the water and add the jaggery to it and stir till it is melted. Strain the jaggery liquid and keep it aside.
In a bowl add the jaggery liquid, the semolina / rawa, the coconut and the cardamom powder and mix well. Keep this aside and heat water in the pressure cooker or steamer. Take the ghee and grease a pan or cooker vessel or a thali with it. Lower the heat when the water in the cooker or steamer starts bubbling.  Add the fruit salt or Eno into the semolina and mix and immediately pour it out into the pan or thali. Steam this for 5 minutes on high heat then reduce to medium heat and continue steaming for another 10 minutes.
Take the thali or vessel out of the steamer or cooker and let it cool. When cool run a knife around the edges and invert onto a plate.
For serving, roast the cashew nuts and raisins in the ghee and decorate the cake with it.
Fact: Semolina or Rawa is also called Farina in some places.
When we shifted to the US we got used to picking up pre-packed bags of groceries. Later we started frequenting a store that was more like a farmers market and with a lot of stuff for the local Mexican population. This store kept bins of loose grain, sugar, lentils, different types of trail mixes and pulses. They had plastic bags into which we could scoop stuff and then had to stick a sticker with the corresponding product code. This was then weighed at the counter and billed. On one of my shopping trips I found a bin that had something called farina and on looking closely discovered it to be rawa. They also had mung bean, dried red chillies, sugar dried peas in those bins and the best thing it was way cheaper than at the Indian  store. We were happy with this find because we did not frequent the Indian store that was about 12 - 15 miles away. That's my story for today!

Tuesday, October 22, 2013

Dal Dosa / Lentil Pancake

Markets have always fascinated me. Of course, I prefer the markets to be clean, at least the pathways but typically in India the markets are dusty and most often the ground is strewn with rotting produce. Open air markets are better in the sense, the air is fresh. We have a weekly market close by, that has vegetables, fruits, food stuffs, clothes, plastic and steel ware, etc. This market is relatively cleaner because it is put up on a less used street with strict instructions to the vendors to keep the place clean. This market is known for its wide variety of fresh fruits and vegetables. On my visit to the market this week , I saw the start of the winter greens like - fenugreek / methi, tender white radish / mooli, spinach / palak, mustard greens / sarson. I got some tender radish and plan on a sambhar one of these days and will also think of some other dish to put it into. For today, I used the tender greens in this recipe.
Ingredients
Moong dal - 1/4 cup
Udad dal - 1/4 cup
Cooked Rice - 1/2 cup
Asafoetida - 2 pinches
Dry red chillies - 3
Curry leaves - 3 to 4
Salt as per taste
Oil to apply on dosa
Soak the moong dal and udad dal for 2 hours. Drain and add both the dals to the blender along with the cooked rice and asafoetida, dry red chillies, curry leaves and salt. Add 1/4 cup water and grind to a smooth paste. The batter should be thick and should drop onto the griddle with a little coaxing. Add water if needed spoon by spoon till you get the required consistency.

Heat a griddle and pour a ladle of batter and spread it to about 3 to 4 inch diameter circle. Apply some oil to the edges  and on top of the dosa and let it set. When the dosa becomes firm turn it over and let it cook on that side too. Since this dosa has cooked rice the dosa needs to be set well to turn over. When both sides are done, slide it onto a plate.

This is the recipe for a simple dal dosa, you can add grated vegetables to the batter and make this a healthy breakfast. Below are two different vegetable toppings I used.
 
Topping 1
Grated carrots and finely chopped tender radish leaves.

Topping 2
Grated carrots and finely chopped capsicum or bell pepper.

Vegetable combinations are endless, take inspiration from what is available in the market and of course your refrigerator.
 

Monday, October 21, 2013

Simple Dal / Amti

This recipe is for a simple dal or amti for those lazy afternoons when all you want is a bowl of steaming hot rice with dal and a dollop of ghee on top. Add to this sabzi, a little achar and a papad and it makes a complete meal. India has many versions or ways of making dal, in fact each state may have multiple versions of dal. The best thing about dal is that it can be made simply with very few seasonings or elaborate and rich with herbs and spices. The best thing about dal is that it is a poor person's as well as a rich person's food. It can be had as a soup, as part of a main course and as dessert.
Ingredients
Dal - 1/2 cup
Turmeric - 1/2 tsp
Asafoetida - 2 pinches
Green chilli - 2
Jaggery - 1 tsp
Curry leaves - 3 to 4
Salt as per taste
Ghee - 1tsp
Wash and soak the dal for 30 minutes. Add turmeric to the dal and pressure cook for 3 whistles. Take the dal out once the pressure is released and heat once again with asafoetida, salt, slit green chillies, jaggery and curry leaves. Let it boil a couple of times. Check the taste for salt and other seasonings. Once done take it off heat.

When ready to serve add the ghee to the dal and its ready to be taken to the table.

Healthy Sweet Poha / Aval Nanachathu

"Aval nanachathu", literally translated is "soaked poha", a quick fix snack from Kerala. I do wonder if it is made that often nowadays, after all not many wants a simplistic and rustic snack and prefer to rely on the ready to eat and frozen snacks. That, though not healthy does make an impression on children and moms. Earlier, if there were unannounced guests the lady of the house served sweet poha or aval nanachathu with tea when nothing else is available on hand. It was also an answer to the mid-meal snacks that was served to children.
 
Aval nanachathu is basically poha or beaten rice soaked in milk with some grated coconut and jaggery added in. The quantity of milk depended on whether the aim was to get some milk down the child's throat or not. Most times just enough milk was added to soften the poha. And the fun was in the surprise for us children when we bit into a piece of jaggery. My recipe of the poha or aval nanachathu includes more than just the milk and jaggery. I made it for breakfast and hence added some fruit, some nuts and some dates to make it really healthy! If it possible try and get the unpolished rice poha. Ingredients or recipe wise there's nothing much to it just throw in all together in a bowl, mix it and your breakfast is good to eat.
Ingredients
Poha / Beaten rice / Aval - 1 cup
Milk - 1/4 cup
Jaggery - 1 tbsp
Banana, elaichi/small - 2
Almond - 6 to 8
Date - 4 to 5
Use the thick poha for this dish. Wash the poha well then drain it completely. Add the milk and poha into a bowl, mix and let it rest till you get the other additions ready.
Slice the bananas and then quarter each slice, grate or shred the jaggery and chop the dates and almonds. Add them in and your breakfast is ready to be served!
 
Keep the jaggery to the minimum so that it is not overly sweet since the banana and dates are also in there. What I liked in my version of aval nanachathu is that all the additions that go in this dish are healthy and good to have for breakfast.

Sunday, October 20, 2013

Chhaas / Seasoned Buttermilk

There is a definite place for yogurt or buttermilk in the Indian diet. Traditionally, Indian meals included a serving of thick yogurt or a glass of chhaas as part of all meals.  With the passage of years and newfound theories buttermilk was slowly dropped off the menu. But off late, the inclusion of probiotic yogurt has almost become a fad in the western countries with India not left far behind. In fact, if Indians had to just go back to including the old fashioned home made dahi or chhaas we would not need these branded probiotic drinks. If fat is a concern either set curd / yogurt with low fat milk or after the curd is set extract the butter and make into chhaas.
Chhaas, is seasoned buttermilk and the seasoning varies based on where it is made. Like in South India the chhaas is seasoned with ginger or curry leaves or lime leaves, whereas in the West and North India the chhaas is seasoned with roasted jeera powder or coriander leaves. The yogurt used to make chhaas should ideally have just turned sour so that when mixed with water it is no longer sour but still has flavor. The recipe of Chhaas given here is the way it is made in the West and North India.
Ingredients (makes 1 glass Chhaas)
Yogurt / Curd / Dahi - 1/2 cup
Water - 1/2 cup
Roasted Cumin pwd - 2 pinches
Coriander leaves - a pinch
Salt as per taste
Add the yogurt and water in a blender and whisk till they are well blended. Add a little salt and mix then pour it into a glass. Drop an ice cube or two into the glass and top the chhaas with cumin powder and coriander leaves. The Chhaas is ready to serve.

Saturday, October 19, 2013

Tapioca Pearls / Sabudana and Almond Pudding

Tapioca pearls, as sabudana is called in the Far east makes for a good pudding because of its gooeyness when cooked. Sabudana is used widely in India, from sabudana khichdi to sabudana vada to sabudana payasam and also sabudana papad. This pudding recipe uses almond milk  with the sabudana and hence works for lactose intolerant people and vegans. But if getting almond milk is tedious, substitute the almond milk with whole milk and it tastes just as good.

I used home made almond milk for this recipe. Soak it for about 18 to 20 hours then wash it well and grind it whole - nuts and skin, to a fine paste. Add water to the almond paste as required to make a thick or thin milk. The milk will have brown specks from the almond skin but almond skin is not bitter or distasteful so it can be left in there. If you are really averse to it go ahead and strain and use.
This recipe also works for people on vrat / fast and would make a healthy dessert as well especially with almonds in it. It is a very mild pudding and relies on the flavor of the almonds and the rose essence to lift it up.
Ingredients
Sabudana - 1/4 cup
Water - 3/4 cup
Almond Milk - 3/4 cup
Sugar - 1/4 cup
Rose essence - 5 to 8 drops
Soak the sabudana in double the water for about 6 to 8 hours. If you are unable to soak for that long its ok it will only increase the cooking time a little. When ready to use drain the water out and keep aside.

Heat a saucepan, add the water and the drained sabudana and let it cook on very low heat. As the sabudana cooks the water is absorbed by it. Keep an eye on it so that the sabudana does not catch the bottom. When almost cooked add thick almond milk to it and mix well. Let it boil, check if the sabudana is cooked then add the sugar and mix it in. This pudding is not very sweet, you may want to adjust the sugar according to preference. Add the rose essence and mix it all well. Keep the pudding lightly liquidy because it thickens as it gets cool. More almond milk can be added if it gets too thick. Take it off the heat and keep aside.
 
Refrigerate it and serve it cold.
 
Update:
This recipe for Tapioca Pearls / Sabudana and Almond Pudding is going to these events :
-  "Diwali Special" hosted by gayathriscookspot.
-  "Diwali Bash 2013" hosted by cooksjoy.
-  "Diwali Delicacies Event" jointly hosted by priyaeasyntastyrecipes & spicytreats

Gyani Dhaba, Dharampur - a review

Almost every review you read about eating places around Kasauli will mention Gyani Dhaba at Dharampur. Most will suggest that you eat there at least once en route to or from Kasauli. So we did give it a try on our way to Kasauli. Gyani Dhaba is not a typical dhaba and you will be disappointed if you expect khaats spread outside and trucks parked around. Instead you will find scores of cars some of them luxury ones  parked in the front. It is an indication of the kind of clientele that frequents Gyani Dhaba.
 
As you drive from Kalka to Kasauli the scenery and vistas just gets more serene and beautiful. But as you near small junctions where there are shops and small eateries the noise level increases phenomenally. Gyani Dhaba is on a stretch of road which has small eateries, shops and cafés on both sides for about a kilometer or so. There is nothing unique about the dhaba's décor just the usual tables and chairs with a counter selling produce of the surrounding area - fruit preserves, honey and tea and another selling a few daily need products. The best tables are the ones lined up by the windows because it is better lit and gives a view of life outside.
 
We reached there around noon and ordered parathas - aloo and paneer, omelets and tea. Curd and pickles were provided on the side with the parathas and butter cubes was provided for a charge. Both the parathas were excellent especially after adding some on it and a dip in the pickle. The omelet though a little oily was fluffy and tasty. And the tea was good and freshly made with just the right amount of milk and sugar, a perfect "paani jyada, doodh kam, shakar kam, kind".  
On our way back to Kalka, we went to Gyani's again. It was lunch time and we ordered a chicken tikka, a vegetarian and a non vegetarian thali and chhaas. The thali comes with 3 rotis, a bowl each of rice, a choice of black or yellow dal, salad and boondi raita with paneer muttar in the vegetarian thali and chicken curry in the non-vegetarian thali. The thali overall, was nothing spectacular - the yellow dal was simple, but there was nothing much to write about the paneer muttar and chicken curry. Another thing that surprised me was that they did not have chicken tikka and the chhaas they served was Amul's Masti chhaas. For me a dhaba not serving chicken tikka and chhaas was an oddity. They had ice creams and gulab jamun for dessert and we ordered the gulab jamun. We enjoyed the gulab jamuns, they were nice and soft without being too oily in a thin and light sugar syrup. And the best thing is the bill at the end of the meal does not hurt.
 
Our verdict - enjoy their parathas, the tea and the gulab jamuns. And do check their counter selling the preserves, pickles, honey and tea leaves. 

Thursday, October 17, 2013

Warm Buttermilk with tempering from Kerala / Kachiya Moru

Kachiya moru is a preparation from Kerala meaning warm buttermilk with tempering. Buttermilk is an integral part of a meal in Kerala and is normally had with rice at the end of a meal. According to Ayurveda, buttermilk is considered to be cold and hence one is discouraged from having it when a person has a cold or if the weather is chilly. This kachiya moru or moru kachiyathu is made for all those kind of occasions. It is also sometimes served with rice as a curry especially when there's a spicy fish or mutton fry on the menu, providing the perfect antidote to a fiery hot dish. This lightly seasoned buttermilk is good for the stomach and is great to have on those days when the stomach is a little delicate. Or have it like a soup before or after a meal on a cold winter day.
Ingredients
Buttermilk - 1 cup
Mustard seeds - 1/4 tsp
Curry leaves - 4 to 5
Green chilli - 1, slit
Turmeric - 1/4 tsp
Salt as per taste
Oil - 1/2 tsp
Run the buttermilk in a blender along with salt to get a smooth mix. Heat oil in a saucepan or kadhai and add the mustard seeds. After it splutters add the curry leaves and the slit green chilli. Sauté for a couple of seconds to coat with oil. Add the turmeric powder and add the buttermilk immediately. Switch off the heat and swirl the saucepan so the whole thing is mixed well. Pour it out into a serving bowl.
The buttermilk should not be boiled just heated, else it will split. It takes only a few minutes to prepare kachiya moru and is usually prepared just as the food is being served so it gets to the table hot.

A variation is to add pepper powder to the kachiya moru instead of green chilli.

Black Eyed Beans Curry a.k.a. Lobia / Chawli Sabzi

Comfort foods come in many tastes and textures; it is one of those dishes that we crave for on those days that we need a little cosseting. Hot rice mixed with black eyed beans or chawli curry on a cold day is one such food for me. But I don't necessarily need a cold day to enjoy a plateful of chawli and rice. We normally avoid making basmati rice unless making biryani, but for this once I made basmati rice because it pairs off well with the black eyed beans / chawli curry.
At our home, like with upma which my husband loves and I don't, the chawli curry is liked by me and hated by my husband. So whenever I cook this, the portion size is reduced further to only a one person size!  But what also happens is I don't make it often enough. Knowing how I enjoy Tomato Pachadi (find my recipe here) and this chawli sabzi, my mom had made this for lunch on one of the days on my last visit. There's nothing more comforting than mom's cooking, whatever the food!

Ingredients
Black eyed beans / Lobia / Chawli - 1/2 cup
Onion - 1
Tomato - 1
Garlic - 2 cloves
Coriander pwd - 1 tsp
Turmeric pwd - 1/2 tsp
Red chilli pwd - 1 tsp
Coriander leaves - 1 tbsp
Salt as per taste
Oil - 1.5 tbsp
Wash the black eyed beans in water and pressure cook it with a cup of water for 2 whistles. Open and take the cooked beans out once the pressure is released.
Chop onions, tomatoes and garlic separately and keep aside.

Heat oil in a saucepan and add the chopped onions. Sauté the onions for a few minutes and then add the garlic. Sauté both of them till the onions are light golden then add the chopped tomatoes. Continue sautéing till the tomatoes start softening then add the turmeric powder, coriander powder, salt and red chilli powder and sauté. Add the boiled black eyed beans to this masala mix. Add water as required if you like it with gravy. Give it a couple of boils so the beans and the masala mixes well and the tastes intermingle.
Black eyed beans can also be made without gravy as a side dish to rice and curry or it can be paired off with chapati. In which case don't add additional water when adding the boiled beans and let some of the liquid evaporate. It thickens a little if kept for some time before serving.

This recipe goes to 'Side Dish Mela' hosted by Cooking4allseasons.blogspot.in
 

Wednesday, October 16, 2013

Quick and Simple Pasta with Broccoli tossed in Butter

When I am in the mood for pasta and do not want to invest too much time making a sauce for it, I resort to this quick and simple way of making pasta. My recipe uses butter and relies on its delectable though sinful taste to up its yum factor. Since this recipe does not have any vegetables I decided on cooking the last bit of broccoli I had lying in the refrigerator. I like to pair bell peppers and onion with the broccoli for a good crunchy stir fry. Broccoli does not do well when over cooked so always add it last and give it only a few tosses. Since I did not have any bell peppers I decided on using only the broccoli today. 
 
Ingredients for the Quick and Simple Pasta
Pasta - 1/2 cup
Onion - 1 medium
Tomato - 1.5 medium
Garlic - 1 clove
Oregano - quick sprinkling
Chilli flakes - 1/2 tsp
Butter - 1 tbsp
Oil - 1 tsp
Salt as per taste
Cheese - 2 tbsp
In a pot put about 1.5 cups of water to boil with some salt. When the water boils add the pasta and cook till the pasta is done. Reserve a couple of spoons of water and drain the pasta and keep aside.

Chop the onion, tomatoes and garlic. I love to feel the crunch of the onions when eating and hence chop the onions into slightly bigger pieces.
Heat a pan and add the butter and oil. When hot add the onion and garlic and saute till the onion turns translucent. Then add the chopped tomatoes and saute till the tomatoes soften. Sprinkle a little salt to quicken the cooking of the tomatoes.

Add the cooked pasta and the reserved water and mix well. Stir till the water evaporates. Sprinkle the oregano and saute the pasta. Take off the heat.

Ingredients for the Broccoli tossed in Butter
Broccoli - 1 cup
Butter - 1 tbsp
Pepper pwd - a couple of pinches
Salt as per taste
Heat a pan and add the butter. When the butter is hot add the broccoli  and toss it till coated with the butter. Sprinkle salt and pepper powder and toss it well. Cook it for a few minutes without losing the crunchiness. Take it off the heat.

In a plate serve some pasta, grate some cheese over it and add some broccoli and a complete meal is ready.